 how-to
7 Steps to Prepare Your Yard for Hardscape Installation
Last Updated: October 24, 2026
Quick Summary
To prepare your yard for hardscape installation, assess the site and plan the layout, call 811 to mark utilities, then clear vegetation and strip grass and topsoil to about 2 to 3 inches deep. Excavate to the required depth, establish drainage away from the house, and compact the subgrade and base in 2 to 4 inch lifts before setting pavers.
- Call 811 before digging; the free service marks underground utility lines within a few days.
- Strip grass with a sod cutter or flat shovel about 2 to 3 inches deep.
- Spread aggregate base in 2 to 4 inch loose lifts, not one thick dump.
- The compacted base should be flat within about 3/8 inch over a 10 ft. straightedge.
- A 300 sq. ft. patio at 10 in. deep produces roughly 2.8 cubic yards of spoil.
Table of Contents
- Step 1: Assess the Site and Plan the Layout
- Step 2: Clear Vegetation, Debris, and Existing Materials
- Step 3: Remove Grass, Roots, and Unsuitable Topsoil
- Step 4: Excavate to the Required Depth for Your Hardscape
- Step 5: Test Soil, Establish Grade, and Manage Drainage
- Step 6: Compact the Subgrade and Build the Base
- Your Hardscape Project Checklist for a Smooth Job
- Preparing for a Hardscape Contractor: What to Have Ready
- Frequently Asked Questions
Step 1: Assess the Site and Plan the Layout
A solid hardscape installation starts with a walkthrough. At Moises Pizana Hardscapes, we tell every homeowner the same thing: the planning hour saves you a week of rework.
Sketch the footprint on paper, then mark it in the yard with stakes and string or marking paint.
Ask yourself three questions:
- Does the layout fit how you actually use the yard?
- Will water drain away from the house?
- Is there room for equipment and material delivery?
A design plan that ignores functional zones creates problems later. Grills need clearance. Fire pits need seating space. Walkways need a natural path from door to destination.
Check Utilities, Permits, and Property Lines
Call 811 before you dig (811 Before You Dig). That free service marks underground utility lines and takes just a few days to schedule.
Pull your property survey so you do not build onto a neighbor's lot. Check with your local permitting office about requirements for retaining walls, driveways, and structures; many municipalities require permits above certain heights or square footages.
Step 2: Clear Vegetation, Debris, and Existing Materials
Clear the site in the right order: big stuff first, then work down.
Remove these items from the project area:
- Shrubs, small trees, and landscape bed plantings
- Old pavers, concrete chunks, or edging
- Rocks, branches, and construction debris
Bag or pile vegetation separately from soil and stone; rent a dumpster if the volume is large.
Watch out: do not rip out mature trees without checking local tree ordinances. Some cities fine homeowners for removing protected trees, even on private property.
Step 3: Remove Grass, Roots, and Unsuitable Topsoil
Grass and topsoil are the enemies of a stable base. Organic material breaks down over time, and your pavers settle and shift.
Roots are the sneaky problem. Pull or grind out roots from nearby trees. Even small roots will push up pavers over time.
Good topsoil can be reused in landscape beds; grass and roots go to compost or the dumpster.
Step 4: Excavate to the Required Depth for Your Hardscape
Excavation depth is the sum of the finished surface, the setting bed, the compacted base, and any allowance for unstable soil. Get the math right and the hardscape stays put; guess and the surface fails within a season or two.
The excavation-depth formula
Use this sequence for any paver or segmental hardscape:
- Finished surface thickness. Interlocking concrete pavers are typically 2 3/8 in. to 3 1/8 in.; clay brick pavers run about 2 1/4 in.; natural stone flagging varies widely. Confirm the actual unit thickness before you dig.
- Setting bed. A 1 in. compacted layer of coarse bedding sand is standard for pavers. Some specifications allow 1 in. to 1 1/2 in.
- Compacted aggregate base. This is the structural layer and the one that changes most by feature (see table below).
- Subgrade allowance. Add 2 in. to 4 in. where soil is soft, organic, or clay-heavy; that material gets removed and replaced with compactable aggregate.
A quick worked example for a paver patio: 2 3/8 in. paver + 1 in. sand + 6 in. compacted base = about 9 3/8 in. of total excavation. Add 2 in. for a soft subgrade and you are near 11 1/2 in.
Base and excavation depths by feature
These are common industry starting points for residential work; soil condition, expected loads, and local freeze depth can change them.
| Feature | Compacted base | Typical total excavation (paver + 1 in. sand + base) | Load notes |
|---|---|---|---|
| Paver walkway | 4 in. | 7 3/8 in. to 8 1/8 in. | Foot traffic only |
| Patio | 4 in. to 6 in. | 7 3/8 in. to 10 1/8 in. | Furniture, grills, fire pits |
| Driveway (passenger vehicles) | 6 in. to 8 in. | 9 3/8 in. to 12 1/8 in. | Vehicle loads; more for clay or soft soil |
| Retaining wall footing | 6 in. to 12 in. | Varies with wall height and batter | Depends on wall height, soil, and surcharge |
Two caveats matter more than the table:
- Freeze depth. In cold-winter regions, the base must extend below the local frost line or be designed to tolerate frost movement. Your local building department can tell you the design frost depth.
- Expansive clay. Clay-heavy soil holds water and heaves. It usually needs a deeper base and a geotextile separation fabric between subgrade and aggregate.
Pre-dig checklist: utilities, easements, and property lines
Before the first shovel, confirm:
- Underground utilities. Call 811 at least a few business days before digging. The service is free and marks public lines. Private lines, irrigation, landscape lighting, gas lines to a grill or fire pit, septic, are not always marked, so hire a private locator if you are unsure.
- Easements. Your survey will show utility and drainage easements. Building inside one can force removal later, and some utilities have the right to dig through your hardscape.
- Property lines. Pull the survey and stake the setback. Do not rely on a fence as the boundary; fences are frequently off the line.
Hitting a gas, electric, or water line is dangerous and expensive. If a mark-out is faded or missing, stop and re-request it. Never assume a line is deeper than your excavation.
Equipment access and spoil disposal
Plan logistics before the crew or rental equipment arrives:
- Access path. A plate compactor, mini-excavator, or skid steer needs a clear route at least as wide as the machine plus clearance. Protect lawns and existing hardscape with plywood or track mats.
- Spoil volume. A 300 sq. ft. patio at 10 in. deep produces roughly 2.8 cubic yards of spoil, plan for a dumpster, a spoil pile location, or a hauler.
- Separation. Keep topsoil, subsoil, and debris in separate piles. Reusable topsoil goes to landscape beds; subsoil and debris go off-site.
For a deeper look at what works in local soil, see our guide on the best base for a paver walkway.
Step 5: Test Soil, Establish Grade, and Manage Drainage
Grade is the slope of the ground, and it decides where water goes.
Test your soil before you build. Dig a small hole and pour in water; if it drains slowly, you have clay-heavy soil that holds water and needs more base depth or extra drainage.
Drainage options to plan for:
- Slope the finished surface away from buildings
- Add a French drain or channel drain at low spots
- Route runoff to a safe discharge point
If water pooling is already a problem, our guide on fixing backyard drainage problems covers the practical fixes.
Step 6: Compact the Subgrade and Build the Base
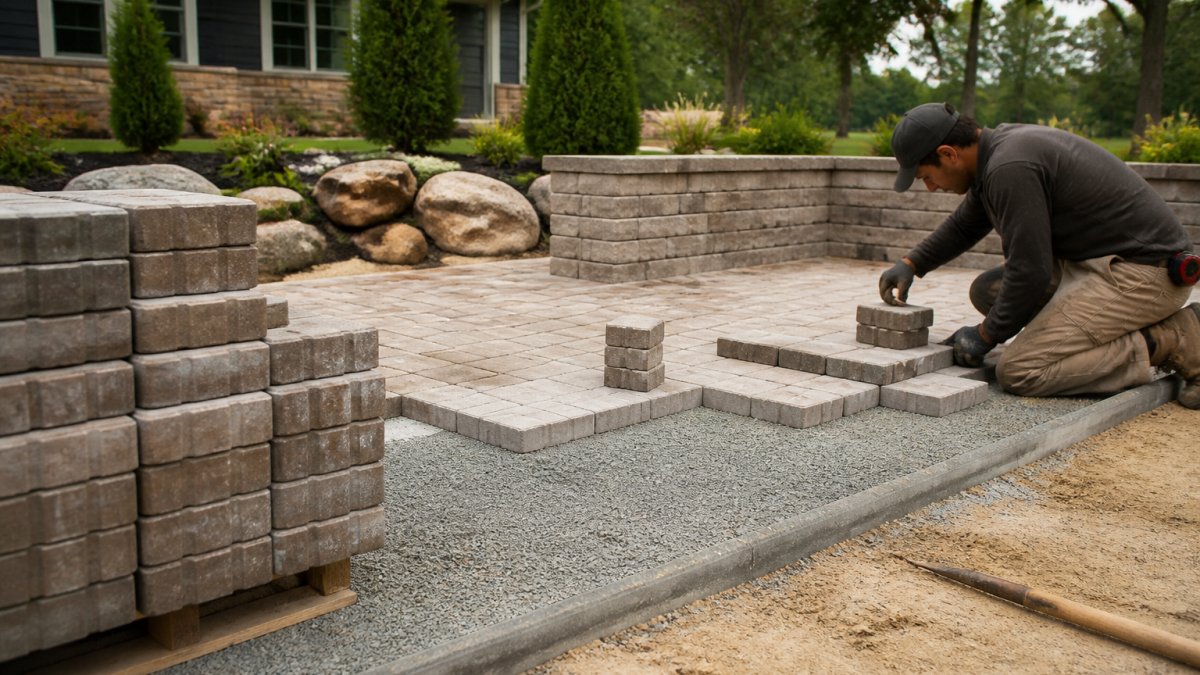
Compaction turns loose soil and aggregate into a structural layer. Skip it, or do it in one thick lift, and the surface will settle, rock, or rut within a season. The goal is measurable, repeatable firmness.
Compact the subgrade first
Before any gravel goes down, proof-roll and compact the exposed subgrade.
- Remove soft spots. Any area that pumps, ruts, or feels spongy underfoot gets excavated and replaced with compactable aggregate. Do not try to compact over soft soil.
- Proof-roll. Run a plate compactor or a loaded wheelbarrow over the subgrade. Soft spots show up as deflection or rutting.
- Moisture check. Soil compacts best near its optimum moisture content. Too dry and it stays loose; too wet and it pumps. A simple field test: squeeze a handful, it should hold together without dripping water. If it is dusty and crumbly, lightly dampen it; if it is muddy, stop and let it dry.
Build the base in lifts
Aggregate base goes down in lifts, not one thick dump.
- Lift thickness. Spread the base in 2 in. to 4 in. loose lifts. Thicker lifts do not compact through their full depth.
- Compaction. Use a plate compactor or vibratory roller sized to the area. Overlap passes by about half the machine width. Two to four passes per lift is typical, but verify by results, not by count.
- Moisture. Dampen the aggregate slightly as you compact. Bone-dry gravel stays loose; saturated gravel pumps.
Installation-ready quality checks and tolerances
Before the setting bed and pavers go down, verify these measurable conditions:
- Base thickness. Confirm the compacted base matches the specification for the feature (4 in. walkway, 4 in. to 6 in. patio, 6 in. to 8 in. driveway). Probe or measure at several points.
- Surface tolerance. The compacted base should be flat within about 3/8 in. over a 10 ft. straightedge. Larger deviations show up as lippage in the finished surface.
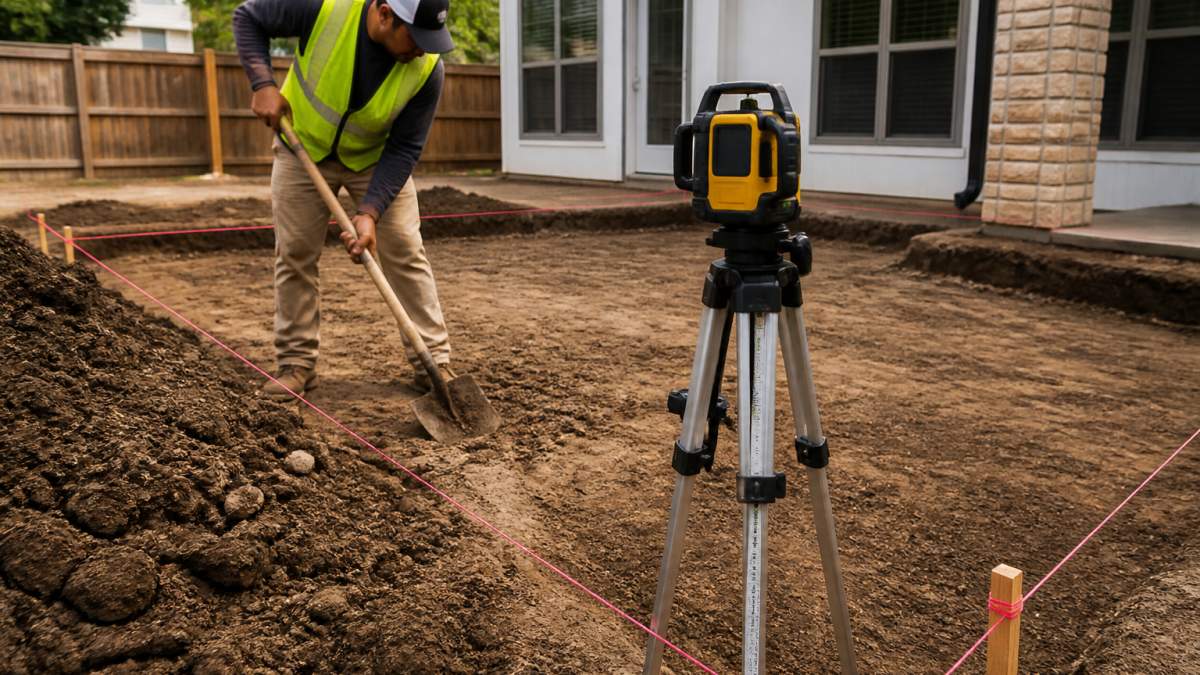
- Grade and slope. Confirm the finished surface will drain away from structures, a common target is about 2% (roughly 1/4 in. per foot) away from the foundation. Check with a laser level or a string line and a line level.
If any of these checks fail, fix it now. Rework after pavers are set costs far more than reworking the base.
When not to compact
Moisture and weather matter as much as technique:
- Saturated soil. Do not compact wet, pumping soil. Excavate and replace, or wait for it to dry.
- Frozen soil. Do not compact frozen subgrade or base. Ice lenses cause heaving and settlement when they thaw.
- Very dry, dusty soil. Lightly dampen before compacting; bone-dry soil will not lock together.
A few readiness checks before you set pavers:
- The base is flat within about 3/8 inch over 10 feet
- The surface is firm and does not shift when you walk on it
- Slope and drainage are confirmed
If water pooling is already a problem, our guide on fixing backyard drainage problems covers the practical fixes.
Your Hardscape Project Checklist for a Smooth Job
Use this checklist to keep the job on track. It is the same hardscape project checklist we run through on every job.
- Utilities marked by 811
- Property lines confirmed
- Permits checked and pulled
If you are still deciding whether to tackle this yourself, compare the DIY vs professional patio installation cost before you commit.
Preparing for a Hardscape Contractor: What to Have Ready
Good prep makes the build go faster and keeps surprises out of your quote. Have these ready before the crew arrives.
- A copy of your property survey
- Utility mark-out confirmation
- Permit approvals, if required
Ask your contractor about hiring hardscape contractors and what to expect on day one. If you are ready to move forward, review our paver patio cost and hiring guide for local details.
Tools for Paver Installation and Site Prep
You do not need everything on day one, but these tools cover most site prep and paver installation tasks. Many can be rented.
- Shovel, edging shovel, and rake
- Wheelbarrow for moving soil and gravel
- Plate compactor for base and subgrade
Frequently Asked Questions
Do I need to mark underground utilities before hardscape work begins?
Yes. Call 811, the national call-before-you-dig line, at least two to three business days before any digging. Utility crews will mark gas, water, electric, and communication lines on your property at no cost. Digging into an unmarked line can cause injury, outages, and repair bills. Also check your property survey for easements, and confirm with your local permitting office whether your project needs a permit before excavation starts.
How long does a paver installation take from start to finish?
A typical patio or walkway runs one to three weeks for most residential projects, depending on square footage, site access, and weather. Site prep and excavation often take two to four days, base compaction and grading another two to three, and paver laying plus cutting and finishing the rest. Driveways and projects with retaining walls take longer. Ask your contractor for a written schedule so you can plan around equipment and material deliveries.
What tools are needed to prepare for a paver installation?
For DIY prep you will need marking paint and stakes, a flat-head edging shovel, a wheelbarrow, a plate compactor, a hand tamper for tight spots, a laser or string level, a rake, and a hose for moisture checks. Safety gear matters too: gloves, boots, and eye protection. Contractors bring heavier equipment like mini excavators and plate compactors sized to the job, which is one reason professional prep often finishes faster and with tighter tolerances.
Should I clear my yard before installing a patio or driveway?
Clear what you can safely reach: furniture, planters, toys, and debris. Leave major vegetation removal, stump grinding, and excavation to the crew unless you have agreed otherwise. Remove anything blocking access to the work area, including gate locks and parked vehicles, and trim low branches that could interfere with equipment. A clear path for wheelbarrows and compactors speeds up the job and reduces the chance of damage to lawns and fences.
The prep work is where most hardscape problems start, and it is where we spend real time. At Moises Pizana Hardscapes, we handle the excavation, grading, and base work ourselves, with our own equipment and crew, so the surface you see is built on ground that holds. We build patios, driveways, retaining walls, and outdoor living spaces with 15 years of experience behind every job. Get started with Moises Pizana Hardscapes and build your outdoor space on a base that lasts.