 how-to
Adding a Built-In Grill to an Existing Patio: Step-by-Step
Last Updated: October 30, 2026
Quick Summary
Adding a built-in grill to an existing patio means setting a grill head permanently into a masonry or framed island with fixed gas and power, so start by checking your slab's thickness, slope, material, and buried lines. Confirm the grill head's manual clearances and local permit rules before framing, and plan ventilation, gas, and electrical routes on paper first.
- Mark the island footprint plus a work zone of about 36 inches on the cooking side.
- Most freestanding grills cannot be safely converted; a manual saying cart use only means no.
- Frame with steel studs, sheathe with cement board, and line the firebox with ceramic fiber insulation or an approved liner.
- Vent the island high and low so hot air escapes and burners draw properly.
- Natural gas needs a line sized for the grill's BTU rating with a dedicated shutoff valve within reach.
Table of Contents
- Before You Build: Assessing Your Existing Patio
- Built-In Grill Installation: Planning the Layout and Enclosure
- Freestanding Grill Conversion to Built-In: Is Your Grill Compatible?
- Framing, Insulation, and Heat Protection for the Enclosure
- Built-In Grill Ventilation Requirements You Cannot Skip
- Gas and Electrical Connections: Planning Your Utility Setup
- Outdoor Kitchen Installation Cost: What Drives the Budget
- Drainage, Weatherproofing, and Long-Term Durability
- Frequently Asked Questions
Before You Build: Assessing Your Existing Patio
Adding a built-in grill to an existing patio starts with an honest look at what you already have. The patio largely decides what the grill can be. Skip this step and you will pay for it later.
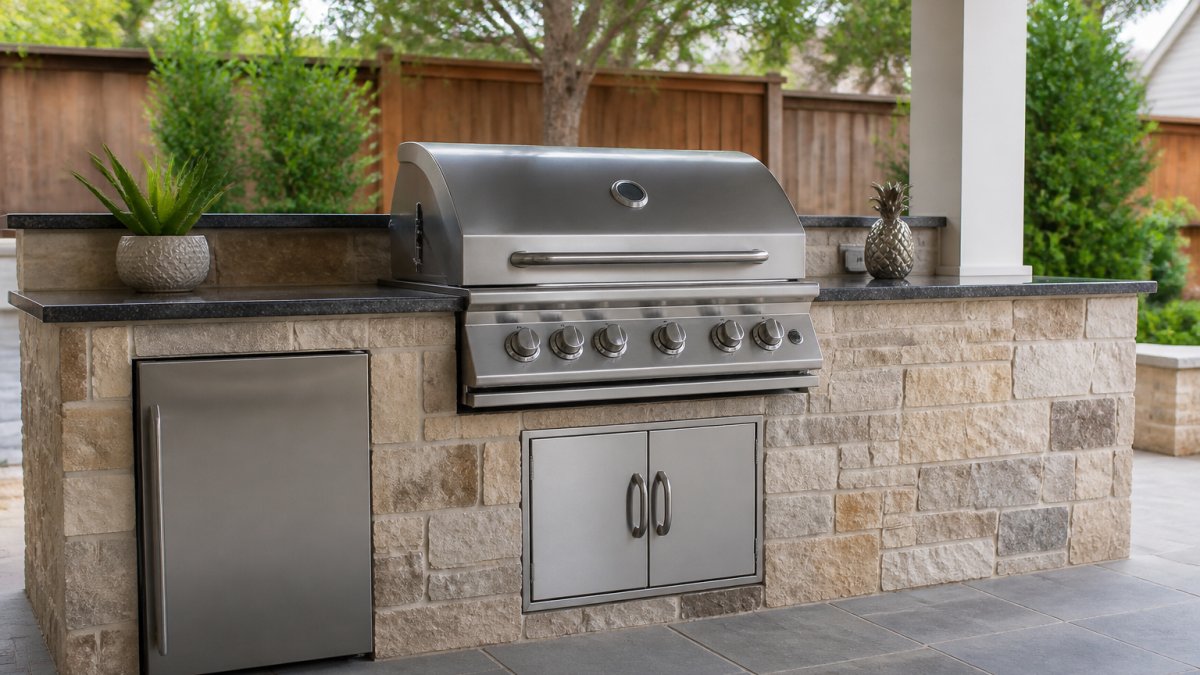
A built-in grill is a grill head set permanently into a masonry or framed island, connected to fixed gas and power. It is not a cart you wheel out on Saturday. That difference drives everything below.
Measuring the Site and Checking the Surface
Grab a tape measure and a level. Mark the footprint of the island plus a work zone of about 36 inches on the cooking side.
Then check the slab:
- Thickness and condition: Hairline cracks are fine. Wide cracks or settled sections are not.
- Slope: Water should drain away from the house. Flat or back-pitched patios pool water.
- Material: Concrete, pavers, and stone each anchor differently.
- Buried lines: Know where irrigation, gas, and electrical run before anyone digs.
Checking Fire Safety, Clearances, and Local Code
Every grill head ships with a manual listing required clearances to combustible materials. Follow those numbers exactly. They override any advice you read online, including ours.
Then confirm local rules before framing. Permit and inspection requirements for gas lines and fixed structures vary by locality. Call your local building department and ask directly. The U.S. Fire Administration home fire safety guidance is a useful starting point for outdoor cooking safety.
Built-In Grill Installation: Planning the Layout and Enclosure
Good built-in grill installation begins on paper, not on the patio. Sketch the island at full scale, then walk the layout before anyone cuts a board.
Place the grill so the cook faces guests, not a wall. Keep the hood's swing clear of traffic. Leave landing space on both sides of the grill head for trays and tools.
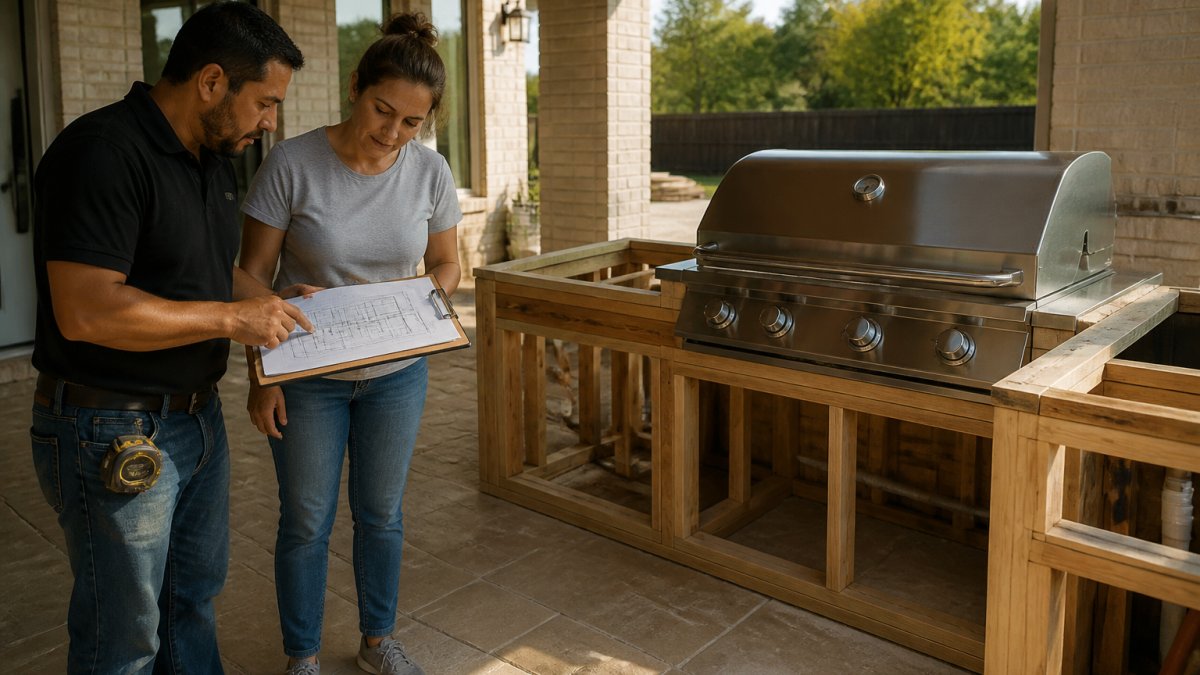
For a deeper walkthrough of enclosure planning, see our guide on planning an outdoor kitchen layout. If you are still deciding between a full build and a simpler setup, this comparison of an outdoor kitchen versus a built-in grill for small backyards is worth five minutes.
Freestanding Grill Conversion to Built-In: Is Your Grill Compatible?
Most freestanding grills cannot be safely converted. That is the honest answer, and it surprises people.
A cart grill sheds heat through its body and needs airflow on all sides. Bury it in an island and that heat has nowhere to go. Burner valves, grease trays, and tank connections also become hard to reach.
Your grill is a good conversion candidate only if:
- The manufacturer sells a built-in version of the same head
- The manual lists clearances for built-in use
- The grease tray pulls out from the front
- Controls sit on a front panel, not the lid
Check the manual first. If it says "cart use only," believe it.
Before cutting into your island, check whether your existing grill head can actually be converted.
| Check | Conversion-friendly sign |
|---|---|
| Manufacturer | Sells a built-in version of the same head |
| Manual | Lists clearances for built-in use |
| Grease tray | Pulls out from the front |
| Controls | Sit on a front panel, not the lid |
| Manual wording | Says "cart use only" means no |
Framing, Insulation, and Heat Protection for the Enclosure
Steel studs and cement board handle heat and moisture better than wood. Pressure-treated lumber works for the base in some designs, but keep it away from the firebox.
Build in layers:
- Frame the island with steel studs or rated lumber.
- Sheathe with cement board.
- Line the firebox opening with ceramic fiber insulation or a manufacturer-approved liner.
- Wrap any combustible surface near the grill in a heat shield.
- Finish with stone, stucco, or tile over a proper substrate.
Never skip the liner to save a few dollars. Heat protection is the one place where cutting corners shows up fast.
Built-In Grill Ventilation Requirements You Cannot Skip
Built-in grill ventilation requirements are simple: heat and gas must escape. A sealed island turns into an oven.
Plan for two things. First, airflow into the cavity so the burners draw properly. Second, vents high and low on the island face so hot air rises out and cooler air enters. Many grill heads also specify a vented hood or an open back.
Watch out: a propane cylinder stored in a sealed cabinet is a hazard. Gas is heavier than air and collects at the bottom. Follow the grill manual and local code for tank storage and venting.
Gas and Electrical Connections: Planning Your Utility Setup
Utility planning is where most patio grill projects stall. Decide the fuel source and power needs before you frame, because changing course after the island is built means tearing into finished surfaces.
Natural Gas vs. Propane
Natural gas is convenient and never runs out, but it requires a fixed line from your meter. Propane delivers more heat per unit and needs no trenching, but you must store a cylinder safely and refill it. For a built-in grill, natural gas is usually the cleaner long-term choice if a line is feasible; propane is common where gas service is unavailable or the run is too costly. Choosing a fuel source often dictates the layout of your masonry, especially if you must begin by breaking up concrete to accommodate new utility lines.
If you choose natural gas, the line must be sized for the grill's BTU rating and the length of the run. A licensed plumber or gas fitter should calculate the load and install a dedicated shutoff valve within reach of the grill. Do not tap into an existing appliance line without verifying capacity.
For propane, the cylinder belongs in a vented cabinet that opens at the bottom, because propane is heavier than air and collects low. Never store a spare tank in a sealed island compartment.
Electrical Needs
Plan a dedicated circuit for ignition, interior lights, rotisserie motor, and any outlets. Use GFCI protection and weather-rated boxes with covers. Position outlets so cords never cross the cooking zone, and keep them at least a few feet from the grill head unless the manufacturer approves closer placement.
When to Call a Licensed Trade
Confirm local requirements with your building department before you dig or wire, as licensing and permit rules for gas and electrical work vary.
Choosing appliances and their utility needs together saves rework. For guidance on selecting the grill and other components, see our article on how to choose outdoor kitchen appliances in DFW.
Outdoor Kitchen Installation Cost: What Drives the Budget
Outdoor kitchen installation cost comes down to five levers: island size, materials, utility runs, site access, and appliance grade. A compact island with a single grill head costs far less than a full L-shaped build with a sink and fridge.
The big swing items are usually the gas line run, electrical work, and finish materials. Site access matters too. A backyard a wheelbarrow can reach is cheaper to build than one a crew has to hand-carry materials into.
Typical Cost Ranges
Costs vary widely by region and scope. The enclosure and finishes, the grill head, and utility work are separate cost components, and a natural gas line run or extensive stonework can change the total considerably. Pricing depends on quantity, dates, and delivery, so visit our website or request a quote for current pricing.
Project Timeline
Utility rough-in, inspection, and finish curing can stretch the calendar. Order the grill head early, because lead times on built-in models can delay the whole project.
For a detailed look at what moves the number, read our outdoor kitchen installation cost breakdown.
Drainage, Weatherproofing, and Long-Term Durability
Water ruins more outdoor kitchens than heat does. Plan drainage before the first block goes down.
- Pitch the patio away from the house
- Set the island on a stable base, not bare soil
- Seal stone and grout on a regular schedule
- Choose stainless steel hardware rated for outdoor use
- Leave access panels for valves and connections
Weather exposure is constant. Wind gusts drive rain sideways, so cover the grill when it is not in use. Winterize gas lines and shut off supply valves before the first freeze.
A build done right lasts decades. Wondering how long the whole project takes? Our guide on how long outdoor kitchen installation takes walks through the timeline.
Adding a built-in grill to an existing patio rewards planning over speed. Get the measurements, clearances, and utility plan right, and the build goes smoothly.
At Moises Pizana Hardscapes, we build custom outdoor kitchens and patios across the Dallas and Fort Worth area. We do not subcontract the work, and our crew brings more than 15 years of experience to every project. From expert hardscape design to fast, precise installation, we handle the whole build.
Get started with Moises Pizana Hardscapes and turn your patio into an outdoor kitchen built to last. Get a quote today.
Frequently Asked Questions
Can you convert a freestanding grill to built-in?
Sometimes, but it depends on the model. A freestanding grill conversion to built-in only works if the manufacturer lists the grill head as approved for built-in use. Grills designed for carts often pull air from the bottom and vent heat through the cart, so dropping the head into an enclosure can trap heat and void the warranty. Check the manual or call the manufacturer before you cut anything. If the grill is not approved, buy a built-in grill head instead of forcing the conversion.
Do built-in grills need to be vented?
Yes. Built-in grill ventilation requirements exist because propane is heavier than air and sinks into the cabinet. If a gas leak occurs in a sealed enclosure, it pools at the bottom and becomes an explosion risk. Most manufacturers require openings in the cabinet floor and near the top, plus a vented access panel or door. Follow the clearance and venting specs in your grill's manual, and never seal an enclosure completely.
Can a built-in grill be installed on an existing concrete patio?
Yes, in most cases. An existing concrete slab can support a built-in grill island if the slab is sound, level, and thick enough for the island's weight. Check for cracks, settling, or pooling water first, because those problems get worse under a heavy enclosure. In some cases a small footing or pad adjustment is needed. A contractor can confirm the slab is a suitable base before framing begins.
Do I need a gas line or electrical connection for a built-in grill?
It depends on the grill. A propane grill needs only a tank inside a vented cabinet. A natural gas grill needs a gas line run to the island, which typically requires a licensed professional; confirm permit requirements with your local building department. Electrical connections are needed for rotisserie motors, lights, or ignition systems, and those circuits should be GFCI-protected outdoors. Plan both utilities before framing so conduit and shutoff valves go in the right place.