 how-to
How to Plan an Outdoor Kitchen Layout in Dallas
Table of Contents
- Start With the Cooking Zone: The Core of Any Outdoor Kitchen Layout
- Pick a Layout Shape: Linear, L-Shaped, or U-Shaped Outdoor Kitchen Design
- Outdoor Kitchen Appliance Placement: Built-In Grills, Side Burners, and Refrigeration
- Best Materials for Outdoor Kitchens in the DFW Climate
- Permits, HOA Rules, and Utility Hookups for Dallas-Area Builds
- Using an Outdoor Kitchen Cost Estimator to Budget Your Project
- Conclusion: Build Once, Build Right for Texas Weather
- Frequently Asked Questions
Last Updated: October 2, 2026
Start With the Cooking Zone: The Core of Any Outdoor Kitchen Layout
The best outdoor kitchen layout in Dallas starts with one decision: where the cook stands. Get that wrong and every other choice, from countertops to cabinet doors, fights you for years.
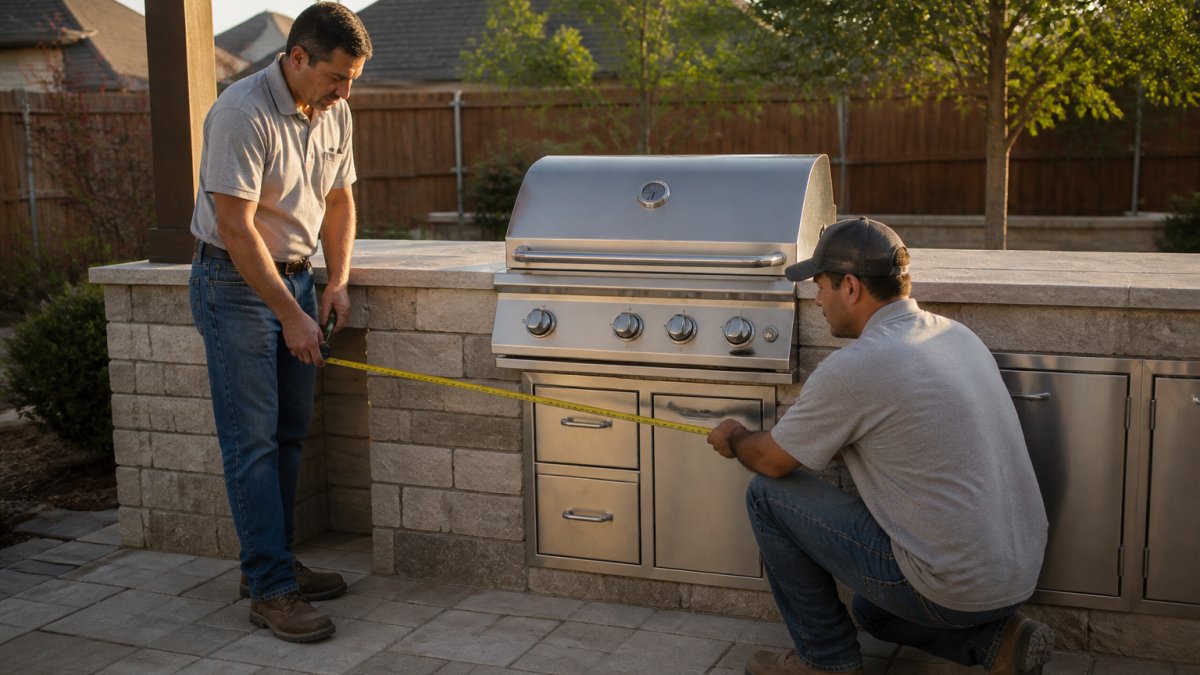
A cooking zone is the work triangle of your backyard: the grill, the prep counter, and the refrigerator, arranged so you can move between them without walking around furniture or guests. At Moises Pizana Hardscapes, we have built outdoor kitchens across the Dallas and Fort Worth area, and the same mistake shows up again and again. Homeowners pick a pretty shape first and squeeze the grill in later.
Do it the other way around. Mark the grill position, then build outward.
The 3x4 Rule and Why It Matters for Tight DFW Patios
The 3x4 rule keeps your cooking zone compact: roughly 3 feet of clear counter on each side of the grill and 4 feet of open floor in front of it.
On a tight patio, this rule is the difference between a kitchen that works and one you avoid. If your space cannot fit 3 feet on both sides, shift the prep counter to an adjacent wall instead of shrinking the clearance.
Pick a Layout Shape: Linear, L-Shaped, or U-Shaped Outdoor Kitchen Design
Three shapes cover almost every backyard: linear, L-shaped, and U-shaped. Each fits a different lot, budget, and style of entertaining.
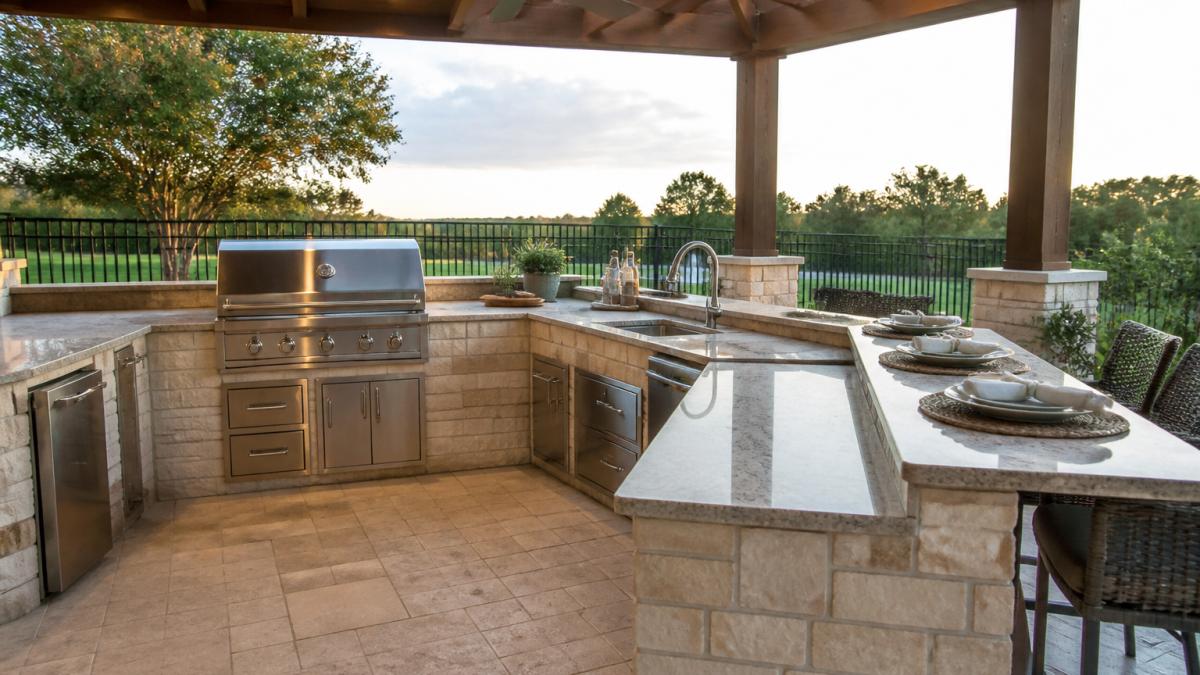
A linear layout runs everything along one wall or counter. It suits narrow side yards and long, thin patios. An L-shaped kitchen turns a corner and separates the cooking zone from the seating area. A U-shaped kitchen wraps three sides around the cook and gives you the most counter space, but it needs a wider footprint.
| Layout | Best For | Space Needed | Entertaining Style |
|---|---|---|---|
| Linear | Narrow patios, small yards | Least | Intimate dinners |
| L-shaped | Corner lots, medium yards | Moderate | Family gatherings |
| U-shaped | Large backyards, heavy hosting | Most | Big parties |
Matching Layout to Your Entertaining Space and Backyard Size
Measure your patio before you fall in love with a design. Walk the space and mark how people will move from the house to the pool to the seating area.
A common mistake is choosing a U-shape for a yard that only fits an L. The counters end up cramped and the traffic flow breaks down. If you host large groups, an L-shape with a separate bar counter usually beats a tight U every time.
Outdoor Kitchen Appliance Placement: Built-In Grills, Side Burners, and Refrigeration
Appliance placement follows the cooking zone, not the other way around. Put the built-in grill at the center, side burners next to it, and the refrigerator at the end of the run closest to the house. That is the easy part. The hard part is the set of dimensions and utility decisions that determine whether the kitchen actually works once the appliances are set in stone.
Clearances and Cutout Dimensions That Actually Matter
Most manufacturers publish a required cutout size and a minimum clearance to combustibles for each appliance. Two numbers drive the whole layout:
- Cutout width and depth. A built-in grill head is wider than the firebox, so the counter opening is sized to the firebox, not the lid. Measure the spec sheet, not the showroom unit.
- Clearance to combustibles. Gas grill manufacturers typically require several inches of non-combustible material behind and beside the firebox. If your counter run is framed in wood, that clearance is non-negotiable.
A common pattern in DFW builds is a 30- to 42-inch built-in grill head with 12 to 18 inches of counter on each side for landing. That is tighter than the 3-foot rule in the cooking zone section, which is why the prep counter usually moves to the adjacent leg of an L or U.
Ventilation, Gas Supply, and Electrical for Built-In Appliances
Built-in appliances need air. A grill set into a sealed cabinet with no ventilation will trap heat and can damage the cabinet frame.
Gas supply is the other half of the equation. A built-in grill can run on a portable propane tank stored in the cabinet, or on a permanent natural gas line.
Electrical is simpler but still worth planning. The refrigerator, any built-in lighting, and an outlet for a rotisserie or small appliance all need GFCI-protected circuits.
The Pool-Deck Angle: Placing Appliances Around Existing Hardscape
Many backyards here already have a pool and a deck, and the kitchen has to fit around them rather than the other way around. Three rules keep that from turning into a tear-out:
- Keep the grill downwind of the pool seating. Smoke drifting across the water ruins the gathering. Watch the prevailing summer wind before you commit to a wall.
- Do not put the refrigerator on the far side of the pool. Every restock becomes a lap around the deck. The fridge belongs on the house side of the cooking zone.
- Leave a walkway between the counter and the pool edge. Most codes and good practice call for a clear path so guests are not squeezing past a hot grill to get to the water.
If the deck is already poured, the appliance run usually follows the existing edge rather than cutting into it. That is a design constraint, not a flaw, it often produces a cleaner linear or L-shaped kitchen than a from-scratch layout would.
Appliance Order That Works in Most Builds
- Built-in grill at the center of the cooking zone
- Side burners within arm's reach of the grill
- Prep counter between the grill and the refrigerator
- Refrigerator at the end nearest the house for easy restocking
- Trash or storage drawer under the prep counter, not next to the grill
Keep the refrigerator out of direct afternoon sun. It runs harder and wears out faster when it bakes all day, and in a Texas summer that is most of the day.
Best Materials for Outdoor Kitchens in the DFW Climate
The DFW climate is brutal on outdoor kitchens: hot summers, freeze-thaw winters, and heavy spring storms. Materials that look great in a showroom can crack, fade, or warp within a few seasons here.
For countertops, dense natural stone and high-quality porcelain hold up well against heat and staining. For cabinetry, choose weather-resistant options built for outdoor use, not interior cabinets with a coat of paint.
- Countertops: granite, quartzite, or porcelain
- Cabinetry: marine-grade or polymer outdoor cabinets
- Framing: galvanized steel or concrete block
- Fasteners: stainless steel, never standard hardware
Permits, HOA Rules, and Utility Hookups for Dallas-Area Builds
Permits and HOA rules are where most DIY outdoor kitchen plans stall. Check both before you buy a single paver. This is the step the generic national guides skip, and it is the one that most often adds weeks to a project here.
What Actually Triggers a Permit
Not every outdoor kitchen needs a permit. The triggers are usually the utilities and the structure, not the countertop:
- Gas line installation. Running a permanent natural gas line to a grill or side burner is plumbing work. It is permitted and inspected in most area jurisdictions, and it must be done by a licensed plumber.
- Electrical work. New circuits, GFCI outlets, and lighting tied into the home's panel require an electrical permit and inspection.
- Permanent structures. A roof, pergola, or masonry wall attached to the ground or the house can trigger a building permit and sometimes a zoning setback review.
- Plumbing. A sink with a drain line, or a water line to an ice maker, is plumbing work and follows the same permit path as the gas line.
A freestanding counter with a portable propane grill and no utilities often needs no permit at all. The moment you add a gas line or a circuit, you are in permit territory.
The Inspection Sequence
Permits are not a single event. A typical sequence looks like this:
- Rough-in inspection after the gas and electrical lines are run but before the counter and cabinets close them in.
- Final inspection after the appliances are set and the connections are made.
Scheduling the rough-in before the masonry goes up is the part homeowners miss. If the counter is built first, the inspector cannot see the line, and the crew has to open it back up.
U.S. Consumer Product Safety Commission guidance on outdoor grill safety
HOA Rules That Kill Outdoor Kitchen Plans
Homeowners associations in the area commonly regulate three things that affect an outdoor kitchen:
- Materials and colors. Many HOAs require the kitchen to match the house's brick, stone, or stucco. A contrasting countertop material may need approval.
- Placement and setbacks. A kitchen built too close to a property line or visible from the street can violate HOA rules even when it passes city code.
- Structures. Pergolas, roofs, and screens usually need architectural review before construction.
The practical move is to submit the design to the HOA at the same time you file for permits. Running them in parallel instead of in sequence can save weeks.
Utility Hookups: What to Line Up Before Construction
- Gas. Confirm the meter can support the added load. A high-BTU grill plus side burners can require a meter upgrade, and that is a utility company request, not a plumber request.
- Electrical. Plan the circuit for the refrigerator, lighting, and any outlets before the conduit is buried. Retrofitting a circuit through finished hardscape is expensive.
- Water. If you want a sink, run the supply and drain before the slab is poured. A drain to daylight or a dry well is common where a sewer tie-in is impractical.
Skipping any of these creates a safety hazard and can fail inspection. The cost of doing it right the first time is almost always lower than the cost of opening up finished work.
Texas State Board of Plumbing Examiners on licensed plumbing work
Using an Outdoor Kitchen Cost Estimator to Budget Your Project
An outdoor kitchen cost estimator helps you set a realistic budget before construction starts. It breaks your project into parts so you can see where the money goes.
Most estimators ask for your layout, materials, and appliance list. From there, you get a range you can adjust. Want to save money? Start with a linear layout and add appliances later.
Here is how to budget in order of priority:
- Set your total number, then subtract 10 percent for surprises
- Price the hardscape and foundation first
- Budget utilities and permits next
- Choose appliances last, with what is left
Pricing depends on size, materials, and site conditions, so get a real quote rather than trusting a generic online number. Moises Pizana Hardscapes provides project consultations and quotes based on your actual yard.
Texas State Board of Plumbing Examiners on licensed plumbing work
Conclusion: Build Once, Build Right for Texas Weather
Getting your outdoor kitchen layout right the first time saves you from tearing out work later. Plan the cooking zone, pick the right shape, and choose materials that survive Texas heat and storms.
Moises Pizana Hardscapes specializes in the construction of Retaining Walls and crafting functional outdoor living spaces for clients in the Dallas and Fort Worth areas. From custom patios and outdoor kitchens to durable driveways, pool decks and elegant walkways. We do not subcontract the work, and our crew brings more than 15 years of experience to every project.
Get a quote from Moises Pizana Hardscapes and build an outdoor kitchen made for your backyard.
Frequently Asked Questions
What is the ideal outdoor kitchen layout for a Dallas backyard?
The ideal layout depends on your space and how you cook. An L-shaped outdoor kitchen layout works well for medium patios because it separates the grill station from prep and seating. A linear layout suits narrow side yards, while a U-shaped design gives the most counter space for entertaining. Start with the cooking zone, then add storage and seating so traffic flow stays clear.
What is the 3x4 kitchen rule for outdoor spaces?
The 3x4 rule says you need at least 3 feet of clearance in front of appliances and 4 feet of aisle space behind seating or walkways. In practice, this keeps the grill station usable and prevents guests from bumping into the cook. On smaller DFW patios, treat these as minimums and measure your space before ordering cabinets or a built-in grill.
Do I need a permit or HOA approval to build an outdoor kitchen in Dallas?
Many Dallas-area projects need a permit, especially when you run a gas line, add electrical hookups, or build a permanent structure. HOA rules often cover setbacks, materials, and fence lines. Check with your city's building department and read your HOA covenants before you finalize the layout.
How do I choose the right appliances for an outdoor kitchen in Texas weather?
Pick appliances rated for outdoor use and built from 304 stainless steel, which resists rust better in humid North Texas summers. Place the built-in grill at the center of the cooking zone, with side burners next to it and a refrigerator within a few steps. Avoid placing a refrigerator in direct afternoon sun, and confirm ventilation gaps so heat does not build up inside the cabinetry.