 how-to
How to Design a Functional Outdoor Cooking Area
Last Updated: October 22, 2026
Quick Summary
An outdoor cooking area functions best when you assess your space, define your cooking goals, and plan distinct zones for cooking, prep, serving, and dining. Position your grill at least 10 feet from your house, add 18 inches of counter space on each side, and choose durable materials like granite, concrete, and stainless steel that withstand weather and heavy use.
- Position your grill at least 10 feet from your house, deck, or overhead structures to prevent fire hazard
- Standard grill height is 36 inches from ground to cooking grate, matching kitchen counter height
- Prep counters should be at least 24 inches deep and 36-48 inches wide for comfortable food preparation
- Allow 36 inches of walking space around your dining table so guests can move without bumping chairs
- Call 811 to mark utility lines before digging to avoid hitting gas, electric, water, or sewer lines
Table of Contents
- Assess Your Space and Define Your Cooking Goals
- Outdoor Kitchen Layout Ideas for Your Available Space
- Outdoor Kitchen Dimensions and Zone Planning
- Select Outdoor Kitchen Appliances and Cooking Equipment
- Choose Durable Materials and Weather-Resistant Countertops
- Outdoor Kitchen Planning Checklist and Installation Essentials
- Integrate Your Outdoor Kitchen with Patio and Landscape Design
- Frequently Asked Questions
Assess Your Space and Define Your Cooking Goals
Designing a functional outdoor cooking area starts with honest assessment. Do you want a simple grill station or a full outdoor kitchen with prep surfaces, storage, and dining?
The biggest mistake we see is building without a clear purpose. A beautiful setup that doesn't match how you cook wastes money and sits unused.
Measure your available space and note sun exposure, wind patterns, and proximity to your house.
Write down your cooking style. Are you grill-focused, or do you want an outdoor oven, side burners, and a smoker? How often will you use the space? Your answers determine everything that comes next.
Outdoor Kitchen Layout Ideas for Your Available Space
The layout of your outdoor cooking area depends on how much space you have. There's no single "best" design, only the right design for your yard. Here's what's realistic by space size.
Small Space Layouts
Small spaces demand smart choices.
For tiny yards, consider a modular design. A portable grill cart with a fold-down work surface lets you move it when you're not cooking, opening up the space. Pair it with a simple outdoor dining table nearby.
The key to small spaces is vertical storage. Wall-mounted cabinets and shelving keep tools accessible without eating up floor space. Even 24 inches of counter depth gives you room to chop vegetables and plate food.
Medium Space Layouts
Medium yards (100-300 square feet) let you build a true outdoor kitchen and separate cooking from prep.
Create distinct zones in a medium space. Keep the hot zone (the grill) separate from the prep zone to prevent cross-contamination and let multiple people work. Add a dining area nearby but not immediately adjacent to cooking, so guests can relax without smoke and heat.
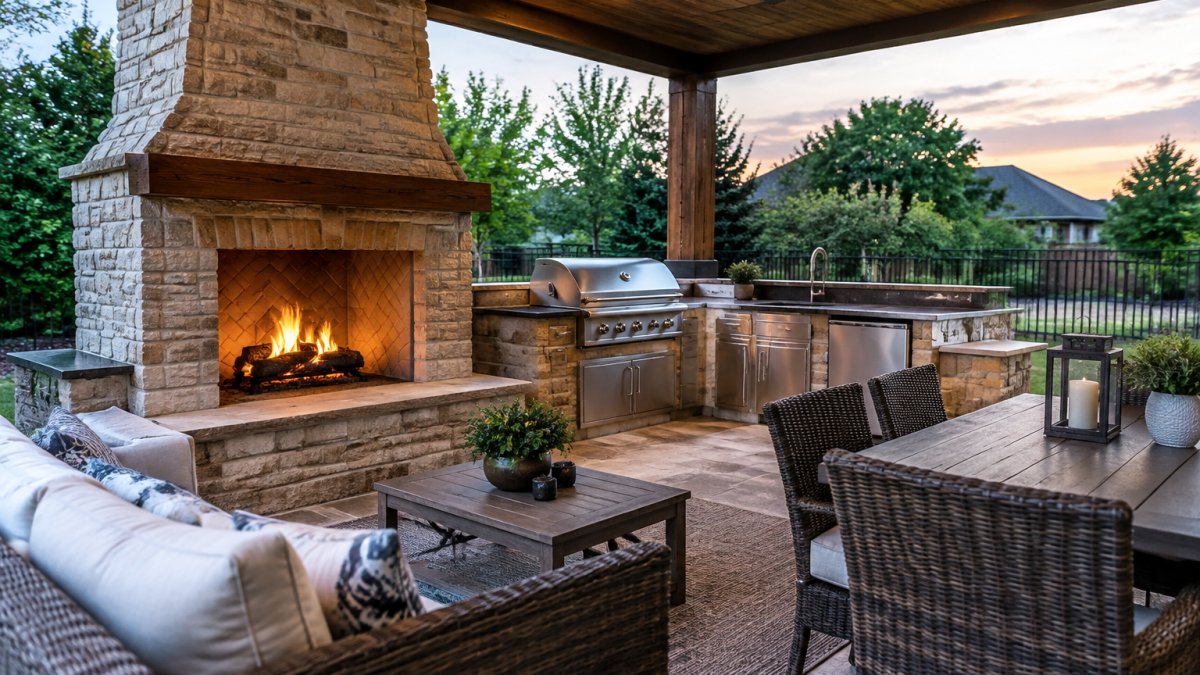
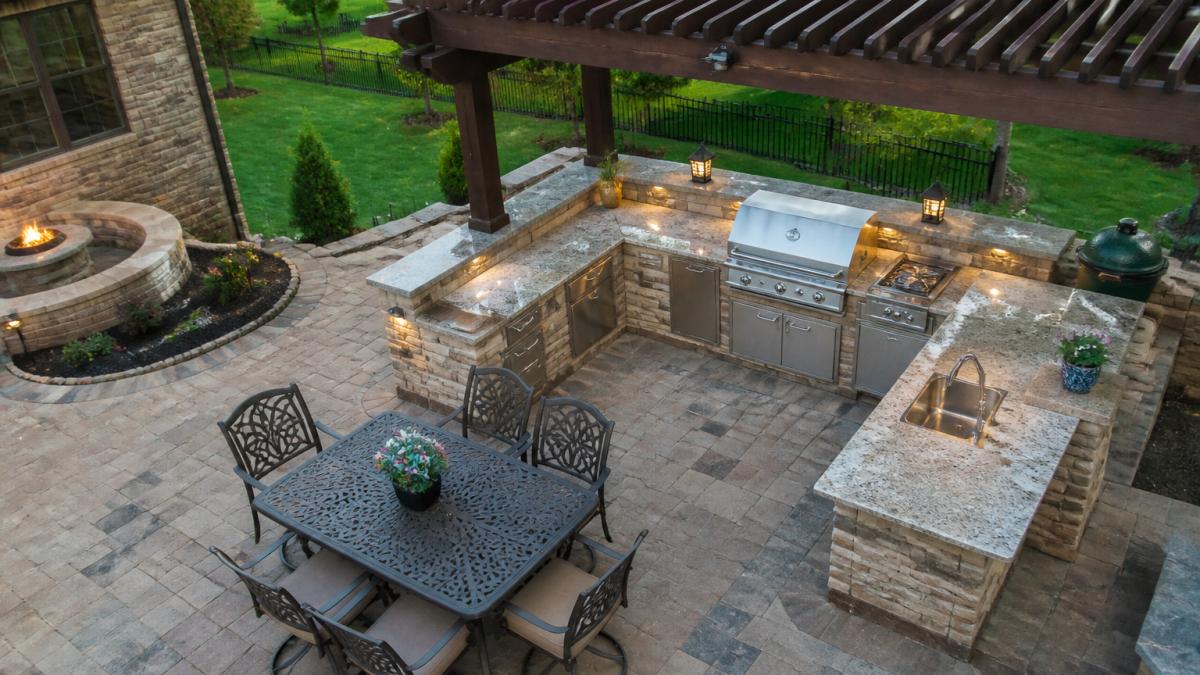
A pergola or shade structure becomes practical in medium spaces. It protects your cooking area from sun and rain, making the space usable on hot days or after showers, and visually defines the outdoor kitchen.
Large Space Layouts
Large yards give you room to dream. With 300+ square feet, you can build a full outdoor kitchen that mirrors an indoor one: grill, side burners, outdoor oven, full prep island, storage, refrigeration, and a separate dining area seating 8-10.
In large spaces, create multiple functional zones. The cooking zone stays focused on the grill and primary appliances. A separate prep island becomes a gathering point.
Large spaces let you add features that make entertaining easier: a beverage cooler near the dining area, a sink with hot and cold water for immediate cleanup, and generous storage so you're not cramming everything into cabinets.
Outdoor Kitchen Dimensions and Zone Planning
Measurements matter. Vague planning leads to awkward spaces. Here's how to size each zone so your outdoor cooking area functions smoothly.
Cooking Zone Measurements
Your grill needs breathing room. Position it at least 10 feet from your house, deck, or overhead structures like pergolas. This clearance prevents fire hazard and lets heat and smoke escape upward.
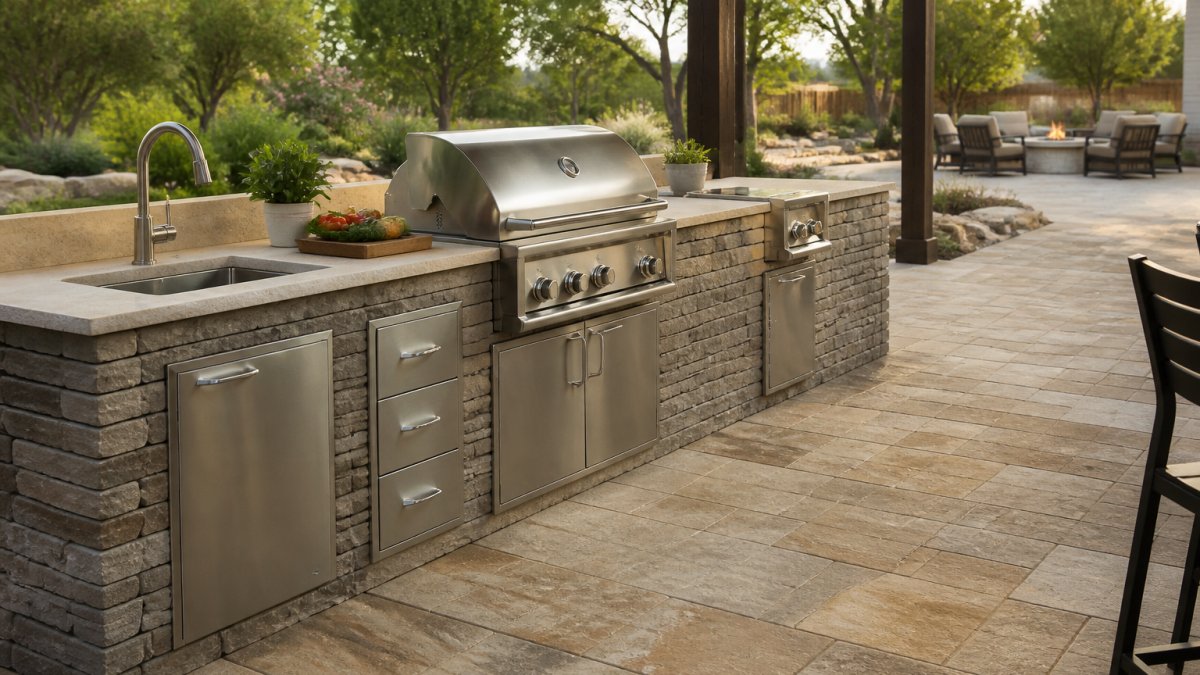
The grill itself typically runs 30-48 inches wide. Add 18 inches of counter space on each side for tools, plates, and food, giving you a 66-84 inch cooking zone minimum. If you're adding a side burner, extend one side to 24 inches.
Height matters too. Standard grill height is 36 inches from ground to cooking grate, matching kitchen counter height and preventing back strain. If you're taller or shorter than average, adjust accordingly.
Prep and Work Surface Sizing
Your prep counter should be at least 24 inches deep and 36-48 inches wide, giving you room for cutting boards, mixing bowls, and ingredients. If you have room, go to 60 inches, extra space always gets used.
Counter height follows the same 36-inch standard as indoor kitchens. Your elbows should bend at roughly 90 degrees when working. Too low and you're hunching; too high and you're reaching.
If you're adding an island or secondary prep surface, make it 24-30 inches wide and at least 48 inches long. Islands let you work from multiple sides and become natural gathering points.
Dining and Serving Area Spacing
Allow 36 inches of walking space around your dining table so guests can move without bumping chairs. For a table seating 6-8 people, budget 36-48 inches of depth and 60-72 inches of length.
Your serving counter or bar should be 24-36 inches deep and 48-60 inches long, with room for platters, drinks, and utensils. Position it between your cooking zone and dining area so you can plate and serve without crossing the yard.
Select Outdoor Kitchen Appliances and Cooking Equipment
Your appliance choices shape how you cook and what your outdoor kitchen costs. Start with what you'll actually use.
A grill is the foundation. Built-in grills range from simple two-burner models to elaborate multi-zone setups. For most home cooks, a 36-48 inch grill with a main cooking area and side burner handles everything.
If you entertain frequently, add a side burner for sauces and sides. An outdoor oven opens possibilities, wood-fired ovens create ambiance and cook pizza, bread, and roasted vegetables beautifully.
Storage and prep equipment matter as much as cooking equipment.
Don't overload your outdoor cooking area with equipment you won't use.
Choose Durable Materials and Weather-Resistant Countertops
Materials make or break an outdoor kitchen. Your outdoor cooking area faces sun, rain, temperature swings, and heavy use. Choose wisely or you'll be repairing and replacing constantly.
Granite and concrete are the workhorses of outdoor kitchens. Granite is beautiful, heat-resistant, and lasts decades. It requires sealing annually to prevent staining.
Stainless steel for appliances and frames resists rust and cleans easily, making it the industry standard.
Wood elements add warmth but require maintenance. For pergolas or trim, choose pressure-treated or naturally rot-resistant species like cedar, and plan to seal or stain every 2-3 years.
For your outdoor cooking area to age gracefully, choose materials that weather well.
Outdoor Kitchen Planning Checklist and Installation Essentials
Before construction starts, confirm these details. A thorough plan prevents expensive mistakes.
Utilities and Clearances
Gas lines must run from your meter to your grill, which requires a licensed plumber or gas technician, don't DIY this work.
Water lines for your sink need shut-off valves so you can drain them before winter. In the Dallas-Fort Worth area, occasional hard freezes can burst unprotected lines, so run water lines below the frost line or install drain valves.
Confirm all clearances before digging. Call 811 or your local utility locating service to mark gas, electric, water, and sewer lines so you don't hit them during construction. This free service takes a few days and is worth the wait.
Safety and Fire Prevention
Your grill needs clearance from combustible materials. Maintain at least 10 feet from your house, deck railings, and tree branches overhead.
Use fire-resistant materials for structures near your cooking zone. Treated wood is better than untreated, but metal and stone are ideal.
Install a fire extinguisher rated for grease fires (Class B or K) near your outdoor cooking area. Know how to use it. A small fire can turn dangerous fast if you're not prepared.
Check local building codes before you build. Some jurisdictions require permits for outdoor kitchens, especially with gas lines or electrical.
| Planning Element | Key Details | Why It Matters |
|---|---|---|
| Available space | Measure length, width, sun, wind | Determines layout and appliance choices |
| Utilities | Gas, water, electrical locations | Prevents costly mistakes and safety hazards |
| Clearances | 10 feet from house and structures | Prevents fire hazard and damage |
| Materials | Granite, concrete, stainless steel | Affects durability and maintenance needs |
| Appliances | Grill, side burner, optional oven | Determines cooking capability and cost |
| Zones | Cooking, prep, serving, dining areas | Creates functional flow for entertaining |
Integrate Your Outdoor Kitchen with Patio and Landscape Design
Your outdoor cooking area shouldn't feel disconnected from the rest of your yard.
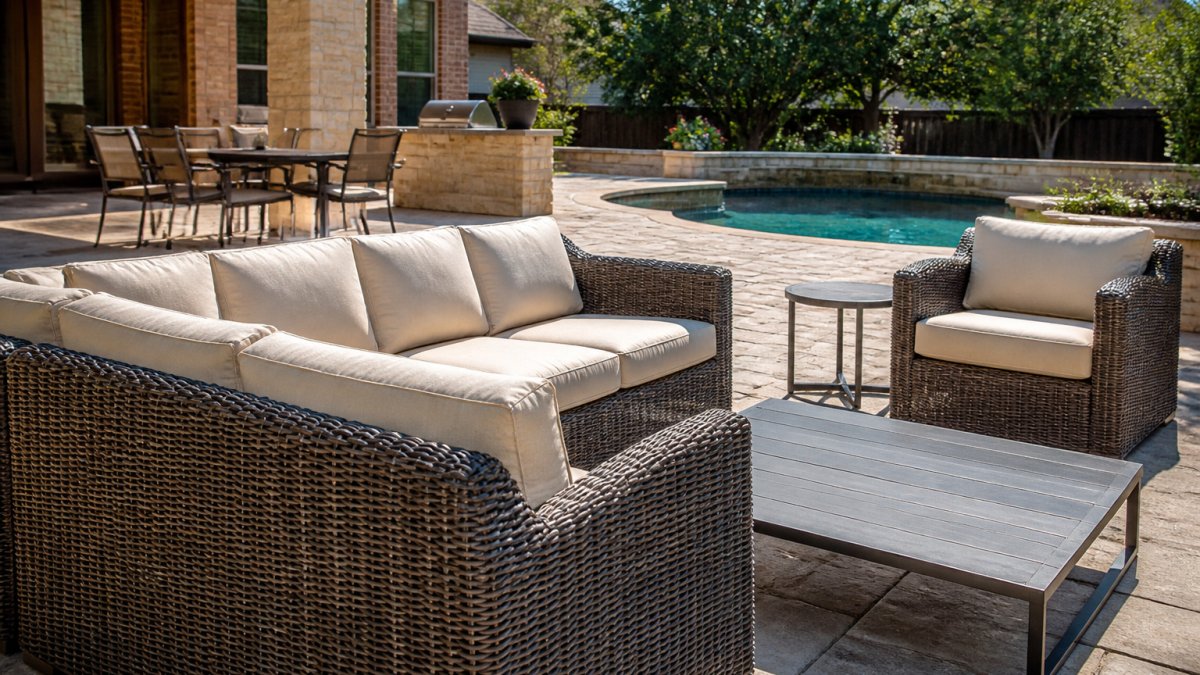
Start by matching materials. If your patio is stamped concrete, carry that into your outdoor kitchen's base or surround.
Shade and shelter tie everything together. A pergola over your cooking zone can match one over your patio seating area.
Consider sight lines.
Lighting extends usability into evening hours. String lights above your outdoor cooking area create ambiance and provide functional light for cooking.
The best outdoor kitchens integrate smoothly with existing landscapes.
An outdoor cooking area transforms how you entertain and enjoy your yard.
If you're ready to build, Moises Pizana Hardscapes can handle the entire project.
Frequently Asked Questions
How much space do you actually need for a functional outdoor cooking area?
A basic outdoor cooking area requires a minimum of 100-150 square feet to accommodate a grill, prep surface, and dining space. Small spaces can work with just 6-8 feet for the cooking zone. Medium setups need 12-15 feet of counter space, while larger outdoor kitchens benefit from 20+ feet. The key is allocating separate zones: cooking (hot zone), food preparation (prep area), storage, and dining. Measure your available space first, then design zones that fit those dimensions without cramping movement or creating safety hazards.
What's the best outdoor kitchen layout for a small backyard?
For small spaces, use an L-shaped or galley layout that maximizes counter space without consuming floor area. Position the grill at one end, prep surface in the middle, and storage below. Keep the dining area adjacent but separate, even 4-6 feet away, to prevent guests from standing in the cooking zone. A kitchen island works well if you have 12+ feet of length. Vertical storage and a compact appliance footprint help you fit everything functional into a tight outdoor cooking area without feeling crowded.
What outdoor kitchen appliances do I actually need versus nice-to-have?
Essential appliances: a quality grill (gas or charcoal), a prep surface, and storage. Nice-to-have additions include a side burner, refrigerator, outdoor oven, or sink. Start with what you'll use most, if you entertain frequently, a sink and extra counter space matter more than a second grill. Consider your cooking style: frequent al fresco dining demands a larger cooking zone and dining area, while casual grilling needs less. Budget constraints? Prioritize a durable grill and weather-resistant countertop first; add extras later as your outdoor cooking area evolves.
How do I protect an outdoor kitchen from weather and ensure it lasts?
Use weather-resistant materials throughout: granite, concrete, or stone countertops withstand heat and moisture better than wood. Stainless steel appliances resist rust. Install a pergola, shade structure, or retractable awning overhead to shield the cooking zone and prep area from direct rain and sun exposure. Seal countertops and wood annually. In areas with freeze-thaw cycles, choose materials rated for temperature swings. Cover the grill when not in use, and store smaller items indoors during harsh weather. Proper grading around your outdoor kitchen prevents water pooling, which extends the life of your hardscape and foundation.