 how-to
How to Clean and Seal Paver Patios Step by Step
Last Updated: November 5, 2026
Quick Summary
Cleaning and sealing paver patios means assessing the surface, removing debris, treating stains with a product matched to each type, refilling the joint sand, and then applying a sealer once everything is fully dry and cured. Work in order, test products on a small hidden area, and fix any drainage or staining source before you seal.
- Fix settled or shifted pavers before cleaning, since sealing will not hide them.
- Identify each stain type first, because rust, oil, and algae need different treatments.
- Never mix bleach-based and acid cleaners, and rinse thoroughly between chemistries.
- Follow the sealer's minimum cure time and avoid rain or very hot pavement during application.
- Penetrating sealers protect from within with a natural look, while film-forming sealers add gloss but can wear or get slick.
Table of Contents
- Assessing Your Paver Patio Before You Start
- Clearing Debris and Choosing a Safe Cleaning Method
- How to Remove Oil, Rust, Algae, and Other Stains
- How to Seal Pavers with Sand and Refill the Joints
- How Long to Wait to Seal Pavers After Polymeric Sand
- Choosing the Right Paver Sealer for Your Patio
- Sealing Pavers: Pros and Cons to Weigh Before You Commit
- Scheduling Your Patio Project and Booking a Professional Crew
- Frequently Asked Questions
Cleaning and sealing paver patios takes patience, the right products, and a clear plan. Done well, it keeps your pavers looking sharp for years. Done poorly, you end up with hazy sealer, sand washing out of the joints, or stains that set for good. At Moises Pizana Hardscapes, we have spent more than 15 years building patios across the Dallas-Fort Worth area.
Assessing Your Paver Patio Before You Start
Before you touch a pressure washer, walk the patio and look closely. Our guide on soil conditions for hardscape features in Fort Worth explains how local ground can affect what you find. Note cracks, loose or shifted pavers, sunken spots, and any dark stains. Check the joints too, because sand that is low or missing tells you whether the patio needs re-sanding after cleaning.
Look for these common issues:
- Settled or shifted pavers that rock when you step on them
- Missing or washed-out joint sand that exposes the base
- Efflorescence, the white chalky film that often shows up on concrete pavers
- Stains from oil, rust, algae, or organic matter like leaves and moss
- Existing sealer that is peeling, cloudy, or wearing thin
Fix structural problems first. Cleaning and sealing will not hide a sunken paver, and it can make a loose one harder to spot. If you see several problem areas, a hardscape professional can tell you whether a repair or a full relay makes more sense.
Clearing Debris and Choosing a Safe Cleaning Method
Start by removing loose debris. A leaf blower or stiff push broom works well for leaves, dirt, and small rocks. Clearing this first keeps grit from turning into a muddy paste once the patio gets wet.
Next, choose a cleaning method that fits the surface:
- Mild detergent and a stiff nylon brush works for light dirt and general grime. This is the safest choice for older or delicate pavers.
- Pressure washing removes deep dirt quickly, but use a wide fan tip and keep the wand moving. Too much pressure can etch the surface or blow out joint sand.
- A specialized paver cleaner helps with stubborn stains and organic growth.
Test any cleaner on a small hidden spot first. Protect nearby plants, and keep runoff away from storm drains. Many cities restrict what can wash into the storm system, so check local rules before you use strong chemicals. Wear eye protection and gloves whenever you work with cleaners or a pressure washer.
How to Remove Oil, Rust, Algae, and Other Stains
Stains need different treatments, so identify the type before you start. Treating a rust stain with the wrong product can make it worse, and treating an oil stain with water alone drives it deeper into the paver. The matrix below maps the most common patio stains to a workable approach, the mechanism behind it, and the precautions that keep you from trading one problem for another.
| Stain Type | Recommended Approach | How It Works | Watch For |
|---|---|---|---|
| Oil or grease | Absorbent powder (kitty litter or diatomaceous earth) first, then a degreaser and scrub | The powder pulls fresh oil out of the pores before a surfactant lifts the residue | Never hose oil into the yard or storm drain; cured oil may need a poultice |
| Rust | Rust remover made for masonry, applied to a small area and rinsed | Oxalic or phosphoric acid converts the iron stain into a soluble salt that rinses away | Strong acids can etch concrete and dull natural stone; keep off plants and metal |
| Algae or moss | Algae cleaner or diluted detergent, scrubbed and rinsed | Surfactants break the cell walls so the growth releases from the surface | Slippery when wet; algae often returns if shade and moisture are not addressed |
| Organic stains (leaves, tannins) | Oxygen-based cleaner and a soft brush | The oxygen releases a fizzing action that lifts tannins without bleaching the paver | Let it dwell, then rinse well; do not let it dry on the surface |
| Efflorescence | Mild acid cleaner made for pavers | The acid dissolves the calcium carbonate film that migrated to the surface | Test first, then neutralize with water; efflorescence can return until the moisture source is fixed |
| Fertilizer or iron supplements | Copious water flush, then a masonry rust remover if a stain remains | Dilution removes the salt load before it binds to the surface | Flush away from plants and drains |
Work one small section at a time. Apply the cleaner, let it dwell for the time on the label, scrub, and rinse before the product dries. Follow the dwell time on the product label, since going past it can risk etching or bleaching. Deep-set contaminants often require specialized techniques for removing stubborn oil stains that standard detergents cannot lift on their own.
Watch out: mixing a bleach-based cleaner with an acid cleaner produces a dangerous gas, so never combine products and rinse thoroughly between different chemistries.
If a stain comes back after cleaning, it may be coming from a source nearby, like a leaking vehicle, a metal planter, or a downspout that dumps water onto the patio. Fix the source before you seal, because sealer over an active stain traps the problem and makes the next cleaning harder.
How to Seal Pavers with Sand and Refill the Joints
Once the surface is clean and dry, check the joints. Joint sand keeps pavers locked together and stops weeds from growing up through the gaps. If the sand is low, top it off now, before sealing.
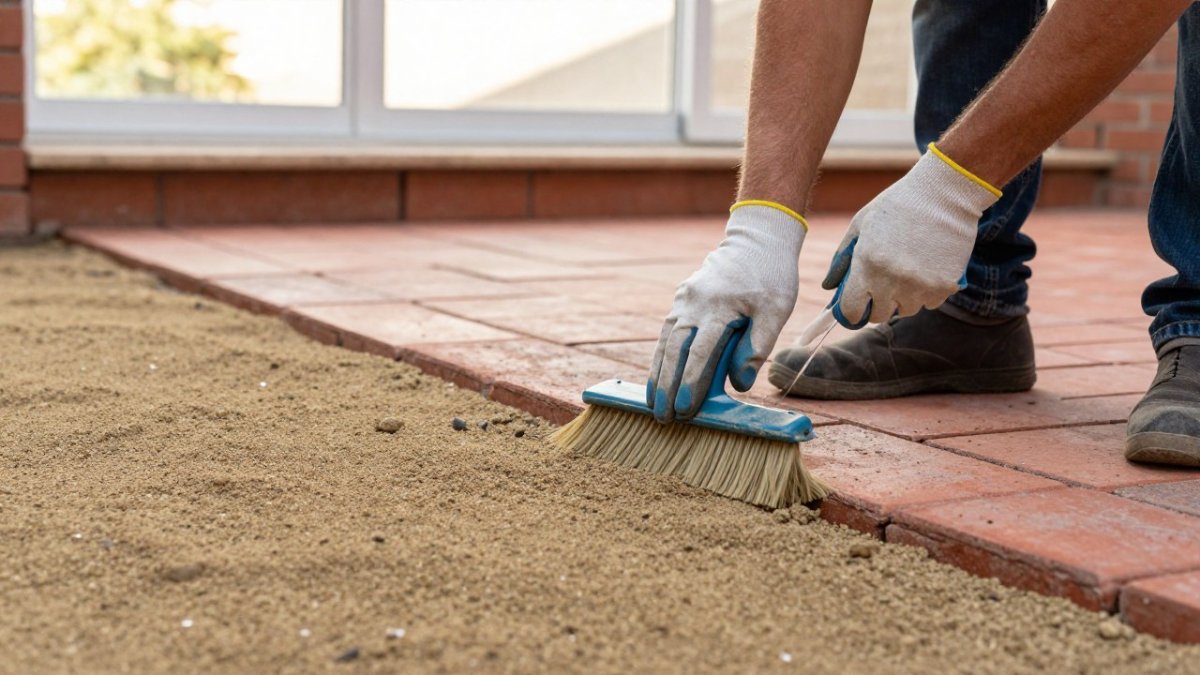
Here is the basic process:
- Sweep a fresh joint sand into the gaps until they are full.
- Compact the pavers with a plate compactor, using a protective pad to avoid marking the surface.
- Sweep again and add more sand where the joints dropped.
- Mist lightly with water so the sand settles, following the product's instructions.
If you use polymeric sand, which hardens when activated with water, follow the bag's directions closely. Too much water too soon can cause haze on the paver face, and too little can leave the sand loose.
How Long to Wait to Seal Pavers After Polymeric Sand
Timing matters here. Sealing too early can trap moisture and leave the polymeric sand soft. Check the label for the minimum cure time before you apply sealer, since the window depends on the product and the weather. Check the label for the minimum cure time, and plan for warm, dry days when the surface is fully dry.
Watch the weather as well. Rain shortly after sealing can cause cloudiness or poor adhesion. Very hot pavement can cause sealer to dry too fast and streak. Aim for mild temperatures and a forecast with no rain.
Choosing the Right Paver Sealer for Your Patio
Sealers come in two main families, and the choice affects appearance, maintenance, and how the patio behaves in wet weather:
- Penetrating (water-based or solvent-based) sealers soak into the paver and protect from within. They keep a natural look, rarely leave a sheen, and generally do not peel because there is no film to fail.
- Film-forming sealers sit on the surface. They add a wet-look gloss and strong color, but they can wear, peel, or turn slippery over time, and they are harder to spot-repair once cured.
Match the sealer to the paver, not just to the look you want. Concrete pavers, clay brick, and natural stone such as travertine or bluestone absorb differently, and a product that performs well on dense concrete can darken or blotch a porous stone.
Confirm compatibility with your joint sand as well. Some sealers are not compatible with certain polymeric sands and can soften or discolor the joints. Look for a product labeled for pavers and check the technical data sheet for the sand type you used.
Coverage matters too. Check the coverage rate on the sealer label, since it varies with porosity and texture. Measure the patio in square feet, divide by the published coverage, and round up.
Weather and moisture decide whether the sealer cures clear or turns hazy. Apply when the surface is fully dry, the air and surface temperatures are within the label's range, and no rain is forecast for the cure window.
If your existing sealer is failing, strip it first with a sealer remover, rinse thoroughly, and let the surface dry before resealing. Resealing over peeling sealer traps the problem underneath. A quick test on one hidden section will show you how the finish looks and how the sealer behaves before you commit the whole area.
Sealing Pavers: Pros and Cons to Weigh Before You Commit
Sealing is not right for every patio, so weigh the trade-offs:
Pros
- Protects against stains, moisture, and freeze-thaw damage
- Makes cleaning easier later
- Locks joint sand in place and slows weed growth
- Can enhance color and depth
Cons
- Sealer needs reapplying every few years
- Film-forming sealers can get slick when wet
- Hard to fix mistakes once a coat has cured
- Some sealers look cloudy or yellow over time
Think about how you use the patio. A busy entertaining space benefits from regular sealing. A shaded patio with few stains may need it less often. A quick test on one section will show you how the finish looks before you commit the whole area.
Scheduling Your Patio Project and Booking a Professional Crew
Plan the work in order: assess, clean, repair, re-sand, let everything dry and cure, then seal. Give each step enough time, and expect weather to shift the schedule.
If you want professional help, ask for a written quote from a contractor who can inspect the site. Pricing depends on the size and condition of the project, so request a quote for current pricing. You can request a quote through the contact page in our footer.
Before you hire anyone, compare options. Our guide to the best hardscape contractors in DFW can help you narrow the list. If you are deciding between doing the job yourself and hiring a crew, read our DIY vs professional patio installation cost comparison to weigh the trade-offs.
Frequently Asked Questions
How much does it cost to have pavers cleaned and sealed?
Pricing depends on the size of the patio, the condition of the pavers, the number of stains to treat, and whether joint sand needs replacing. Because costs vary this much from one project to the next, the most reliable way to get a number is to request a quote that inspects your specific patio. You can request a quote for your project through the company's website. Ask any contractor whether the quote includes cleaning, stain treatment, joint sand, and sealer, so you can compare the same scope of work.
Should I clean pavers before sealing?
Yes. Sealer locks in whatever is on the surface, so dirt, efflorescence, algae, and oil stains need to be removed first. Sweep or blow off loose debris, wash with a suitable cleaner, and let the surface dry completely before sealing. Skipping this step is one of the most common reasons sealer looks cloudy or fails early. Sealing over an uncleaned patio can trap stains permanently under a film.
How long should you wait to seal pavers after applying polymeric sand?
Check the specific product label for the recommended curing time before sealing, since curing times vary, and allow longer in humid or cool weather. Sealing too early can trap moisture in the joints and prevent the sand from hardening properly. Dry, mild weather with no rain in the forecast gives the best results.
Is there a downside to sealing pavers?
Sealing has trade-offs. Film-forming sealers can look glossy or slippery when wet, and they can peel or haze over time if applied too thickly or in poor weather. Penetrating sealers avoid the sheen but need reapplication more often. Sealing also adds a maintenance cost every few years. For many patios the protection against stains, weeds, and joint erosion is worth it, but it is not required for every installation.