 How-to
ADA Compliant Residential Walkway Surfaces That Actually Work
Last Updated: November 7, 2026
Quick Summary
ADA compliant residential walkway surfaces must be firm, stable, and slip resistant, with joints kept narrow and filled and level changes ground flush or ramped. Concrete ranks first, followed by asphalt and interlocking pavers on a compacted, drained base, while gravel and dirt fail the firm-and-stable test for wheelchair access.
- The federal ADA Standards govern public buildings and commercial property, not private homes, but remain the best design blueprint.
- Keep clear width at 36 inches minimum, measured at the narrowest point of the path.
- Keep joints narrow and filled with sand, and re-sand paver joints as needed.
- A half-inch lip at a door or threshold is where canes catch and wheels stop.
- Walk the path wet after the first big rain to find ponding, washed-out joints, and lipped seams.
Table of Contents
- What ADA Walkway Requirements Actually Mean for a Home
- The Core Surface Rules: Firm, Stable, and Slip Resistant
- Surface Materials Ranked for ADA Compliant Walkways
- Accessible Paver Walkway Design: Joints, Gaps, and Level Changes
- ADA Wheelchair Clearance Requirements: Width, Slopes, and Passing Space
- Your ADA Compliance Checklist for a Residential Path
- Assessing and Retrofitting an Existing Walkway
- Planning Your Accessible Walkway with Moises Pizana Hardscapes
- Frequently Asked Questions
What ADA Walkway Requirements Actually Mean for a Home
ADA compliant residential walkway surfaces start with one idea: a path a wheelchair or walker can use without getting stuck, tripping, or sliding. Because a walkway’s firm, slip-resistant surface matters most where it meets a change in height, residential ramp installation safety should be considered alongside slope and joint design.
The federal ADA Standards govern public buildings and commercial property, not private homes. But they remain the best blueprint for a safe, usable path, and many homeowners want them anyway.
The rules ask for a walking surface that is firm, stable, and slip resistant, with limited slope, tight joints, and enough clear width for a wheelchair.
Below, we walk through the surface rules, rank materials, and give you a checklist you can measure yourself.
The Core Surface Rules: Firm, Stable, and Slip Resistant
A walkway surface must be firm, stable, and slip resistant. Firm means it does not shift under a wheel. Stable means it holds its shape over time.
Those three words carry most of the weight. The ADA Standards for Accessible Design define floor and ground surfaces this way, and every other rule flows from them.
What does that look like in practice?
- Firm: concrete, asphalt, and tightly set pavers. A wheelchair wheel does not sink in.
- Stable: the base under the surface is compacted and drained. No soft spots.
- Slip resistant: a slightly textured finish. Polished surfaces get slick in rain.
A common mistake is judging a path by its top layer alone. The base does the real work.
Surface Materials Ranked for ADA Compliant Walkways
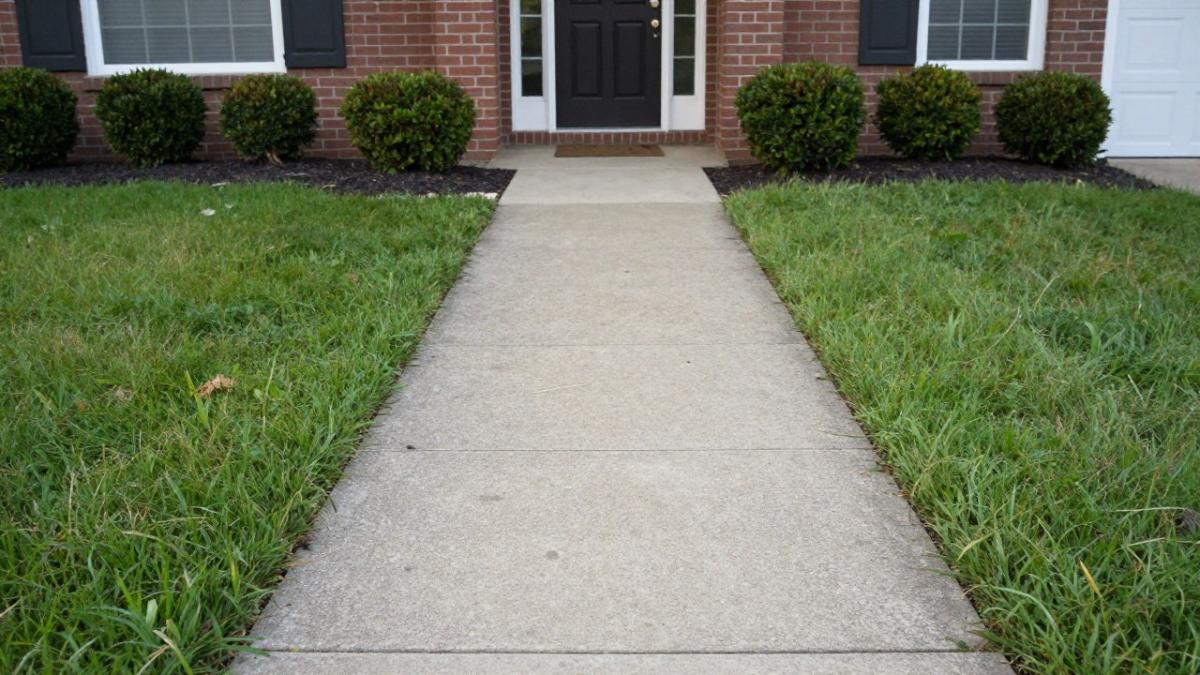
Concrete is generally a strong choice for most homes, followed by asphalt, then interlocking pavers set on a proper base. For a deeper cost and durability breakdown of pavers vs poured concrete, see our full comparison. Wood decks come next. Gravel, dirt, and decomposed granite generally fail the firm-and-stable test for wheelchair access.
Concrete
Firmness: Excellent. A properly poured slab does not deflect under a wheelchair caster or a walker tip.
Stability: Excellent when the subbase is compacted and drained.
Slip resistance: Good with a broom finish.
Upkeep: Low. Re-seal joints as needed and keep control joints from widening.
Accessibility risks: Heaving at tree roots, spalling at freeze-thaw edges, and lips where a new slab meets an old one.
Asphalt
Firmness: Good when new and properly compacted. Softer than concrete underfoot, which some homeowners prefer.
Stability: Fair to good.
Slip resistance: Good when the surface is textured. Avoid sealcoating that fills the aggregate and leaves a smooth film.
Upkeep: Moderate. Crack fill and patch as needed; plan on resurfacing eventually.
Accessibility risks: Settlement creates cross slope and ponding. A dip at a driveway apron is a common trip point.
Interlocking Pavers
Firmness: Good when set tight over a compacted, drained base.
Stability: Good if the edge restraint is solid and the joint sand stays full.
Slip resistance: Good. A textured paver face grips well wet or dry.
Upkeep: Moderate. Re-sand joints periodically and reset any unit that settles.
Accessibility risks: Wide or eroded joints, lipped units, and a half-inch lip at a threshold.
Wood Decks
Firmness: Good if the boards are tight and the framing is sound. A springy deck is not firm.
Stability: Fair. Wood moves with moisture and temperature, so gaps open and close seasonally.
Slip resistance: Fair to good. Wet wood, especially composite without a textured surface, can be slick.
Upkeep: Moderate to high. Boards cup, splinter, and need refinishing.
Accessibility risks: Gaps between boards wide enough to catch a caster or cane tip, and a raised lip at the deck-to-walkway transition.
Compacted Aggregate and Decomposed Granite
Firmness: Poor unless stabilized with a binder and kept maintained. Loose aggregate shifts under a wheel.
Stability: Poor to fair. It ravels, washes, and ruts.
Slip resistance: Fair when dry, poor when wet and muddy.
Upkeep: High. Rake, replenish, and re-compact.
Accessibility risks: Wheels sink and dig in, and cane tips catch. This is the material most likely to strand a wheelchair user after rain.
Gravel and Dirt
Firmness: Fails. Wheels sink and dig in.
Stability: Fails. Surfaces rut, wash, and migrate.
Slip resistance: Poor when wet.
Upkeep: High.
Accessibility risks: Not usable for wheelchair access, even on a short path. If a natural look is required, use a stabilized binder and keep it maintained, or confine loose material to planting beds beside a firm path.
How to Use the Comparison
Match the material to the route, not the look alone. A front path from the street to the door carries the most traffic and should be the firmest, most stable surface you can afford. A side path to a garden shed can be more forgiving. To compare two materials, roll a loaded wheelbarrow across a wet sample and watch for sinking, rutting, and slipping.
Accessible Paver Walkway Design: Joints, Gaps, and Level Changes
Accessible paver walkway design lives or dies on the details: joint width, surface openings, and how the path handles a change in level.
The U.S. Access Board guide to accessible surfaces treats gaps and openings as trip and wheel hazards. Small openings are tolerable.
Here is how we handle it:
- Joint openings: keep them narrow and filled with sand. Re-sand as needed.
- Surface openings: keep drainage grates tight and flush. Avoid wide gaps.
- Level changes: a small vertical lip is a trip hazard. Ramp it or grind it flush.
A common mistake is a beautiful paver path with a half-inch lip at the door.
Good joints and level surfaces depend on the base. For DFW-specific base guidance, see our guide to the best base for a paver walkway.
ADA Wheelchair Clearance Requirements: Width, Slopes, and Passing Space
ADA wheelchair clearance requirements set the target: a clear width of at least 36 inches, gentle slopes, and passing space where the path is long.
Width is the easy one. A 36-inch clear path lets a wheelchair pass.
Slope is where most home paths fail. Running slope is the grade along the path. Cross slope is the side-to-side tilt. Both should stay gentle.
Here is the practical target:
- Clear width: 36 inches minimum.
- Running slope: keep it gentle, and use a ramp where the grade is steep.
- Cross slope: keep it nearly flat so water drains without tilting the path.
Drainage ties into slope. If the path tilts to shed water, make sure it does not pool.
Your ADA Compliance Checklist for a Residential Path
Use this checklist to plan or check a path. It turns the standards into measurements you can take with a tape and a level, in the order a contractor would check them.
Before You Build: Route and Layout
- Map the route from the street to the door. Walk the path a wheelchair user would take: from the parking spot or sidewalk, across the driveway apron, up the front walk, and over the threshold. Note every surface change, every slope, and every place a wheel would have to turn.
- Measure the narrowest point. Clear width should be at least 36 inches. Measure at the tightest spot, not the widest. A path that pinches at a planter or a downspout fails even if the rest is generous.
- Check the running slope. Keep it gentle. Where the grade is steep, plan a ramp rather than forcing the path to climb.
- Check the cross slope. Keep it nearly flat so water drains without pulling a wheelchair toward the edge. A level held across the path shows you the tilt in seconds.
- Plan passing space. On long runs, add a wider spot so two people can get by. A wheelchair user meeting a delivery cart should not have to back up.
During Construction: Surface and Details
- Verify the base. Compacted, drained base means the surface stays firm and stable. A paver walkway over a bad base will heave and settle, and then it is neither firm nor stable.
- Check joint and gap width. Keep joints narrow and filled with sand. Wide, washed-out joints are the failure point on paver paths.
- Check surface openings. Keep drainage grates tight and flush. Avoid wide gaps that catch a caster or cane tip.
- Check level changes. A small vertical lip is a trip hazard. Ramp it or grind it flush. Where pavers meet concrete or a threshold, make the seam smooth.
- Check slip resistance. A slightly textured finish grips a shoe or tire when wet. Test a wet spot with your shoe before you sign off.
- Check drainage. The path should shed water without pooling. Watch out: a path that looks flat can still pond if the subbase is not graded to drain.
After the First Big Rain
- Walk the path wet. Look for ponding, heaved or sunken pavers, wide washed-out joints, cracked concrete edges, and lipped seams. Each of those is a clue to what is failing: the surface, the joints, the slope, or the base.
- Re-test firmness. Roll a loaded wheelbarrow or a chair across the path. Any sinking or rutting means the base needs attention.
- Re-check the narrowest point. Settling and sand migration can narrow a path over time.
Quick Reference Table
| Check | Target | How to Verify |
|---|---|---|
| Clear width | 36 inches minimum | Tape measure at the narrowest point |
| Surface firmness | No sinking under a wheel | Roll a loaded wheelbarrow or chair across it |
| Joint and gap width | Narrow and filled | Visual check, refill sand as needed |
| Level changes | Flush or ramped | Level across seams and thresholds |
| Cross slope | Nearly flat | Level side to side |
| Drainage | No standing water | Check after a heavy rain |
| Slip resistance | Textured, not polished | Test a wet spot with your shoe |
Run this list before you build and again after the first big rain. It catches most problems early, when they are cheap to fix. Skipping the route and layout step is the most common mistake, because a perfect surface on a badly routed path still fails the person it was built for.
Assessing and Retrofitting an Existing Walkway
Many existing paths can be retrofitted rather than replaced. The fix depends on what is failing: the surface, the joints, the slope, or the base.
Walk the path after a rain. Look for these clues:
- Ponding water: the slope or drainage is off.
- Heaved or sunken pavers: the base is failing.
- Wide, washed-out joints: the sand is gone and needs refilling.
A sloped yard is the hardest retrofit. You may need to re-route the path or build a graded ramp. For options on tricky grades, see our article on concrete walkway alternatives for sloped yards.
Planning Your Accessible Walkway with Moises Pizana Hardscapes
A safe, accessible path comes down to five things: a firm surface, tight joints, gentle slopes, good drainage, and a solid base. Get those right and the path works for everyone, from a wheelchair to a delivery cart to a kid on a bike.
This is the work we do. We design and install walkways, patios, retaining walls, and driveways across the Dallas and Fort Worth area. Our crew brings more than 15 years of experience to every job.
If you are ready to build, you can request residential walkway paver installation in Grapevine, TX and get a quote for your property. Read our step-by-step guide to booking a hardscape design consultation so you know what to expect.
A path that trips up a wheelchair, a walker, or a guest with a cane is a path that needs attention.
Frequently Asked Questions
What is the ADA requirement for walkways?
The ADA Standards require an accessible route with a firm, stable, and slip-resistant surface, a clear width of at least 36 inches, and a running slope no steeper than 1:20 to count as a walkway rather than a ramp. Cross slope is limited to 1:48. Small changes in level must be handled with beveling or a ramp, per the ADA Standards. Gaps and joint openings are capped at 1/2 inch.
Can pavers be ADA compliant?
Yes. Pavers meet ADA walkway requirements when the finished surface is firm, stable, and slip resistant, and when joints stay at or under 1/2 inch. Accessible paver walkway design depends on a properly compacted base, tight joint spacing, and consistent grading so no paver sits proud of its neighbors. A settled or uneven paver creates a vertical change that fails the surface criteria even if the material itself is fine.
Are gravel or decomposed granite walkways accessible?
Loose gravel and standard decomposed granite generally do not meet ADA compliant walkways criteria because the surface shifts under wheels and feet, so it is not firm or stable. Stabilized decomposed granite with a binding agent can perform better, but it still requires regular maintenance and topping up. For a reliable accessible route, concrete, asphalt, or well-set pavers are the safer choices.
Do ADA walkway requirements apply to private homes?
The ADA Standards legally apply to public accommodations and commercial facilities, not most private residences. Many homeowners still follow them because the dimensions and surface rules are a proven benchmark for wheelchair access, aging in place, and safety. If your home has a rental unit, a home business, or is being prepared for resale, check local code and fair housing rules before assuming the standards do not apply.