 how-to
How to Install Permeable Walkways for Drainage
Table of Contents
- Assess Your Site and Drainage Needs
- Check Soil Conditions and Infiltration Capacity
- Plan Your Walkway Layout and Grading
- Excavate and Prepare the Subgrade
- Understanding the Permeable Paver Installation Process
- Installing Permeable Pavers on a Slope
- Permeable Paver Cost Compared with Concrete
- Permeable Walkway Maintenance and Drainage Testing
- Frequently Asked Questions
Last Updated: October 15, 2026
Assess Your Site and Drainage Needs
Before installing permeable walkways drainage solutions, walk your yard after heavy rain and note where water pools or runs off.
Water flows downhill, so a walkway in a low spot needs extra drainage planning, while a sloped site moves water faster.
Measure the Site, Don't Just Eyeball It
A few cheap tools turn slope guesswork into numbers you can design against:
- Slope: Set a 4-foot level on the ground and measure the gap under the low end. A 1/4-inch gap is roughly 0.5% grade; 1 inch is about 2%. Repeat at several points along the path.
- Ponding depth: After a storm, measure the deepest puddle. Water lingering more than 24-48 hours signals slow-draining soil or a low spot needing an overflow path.
- Runoff direction: Trace where water leaves the property, street, neighbor's lot, foundation, or a low corner that never dries.
- Roof and gutter discharge: Downspouts dumping near the walkway route add a large, concentrated volume of water. Note their locations; you may need to extend them away from the path.
Plan Where the Water Goes
Permeable walkways drainage systems infiltrate only the water that falls on them, not runoff from the rest of the yard. Decide up front where overflow goes, storm drain, rain garden, swale, or French drain, and plan an overflow route for low spots.
Locate Utilities Before You Dig
In the United States, call 811 before any excavation. The free service marks public utility lines (gas, electric, water, telecom) but typically not private lines on your property, irrigation, landscape lighting, a grill gas line, or septic. Locate those yourself or hire a private locator.
A practical pre-dig checklist:
- Call 811 at least two to three business days before digging (requirements vary by state).
- Wait for the marks and respect the tolerance zone around each flagged line.
- Hand-dig within the tolerance zone rather than using a machine.
- Map private lines you already know about (sprinklers, lighting, gas, septic).
- Photograph the marks before excavation so you have a record.
Check Permits, Codes, and HOA Rules
Permit and code requirements vary by city, county, and subdivision, so check before you dig:
- Local building or public works department: Ask whether a walkway tied into drainage or near a right-of-way needs a permit or grading review.
- Stormwater rules: Some jurisdictions regulate how much impervious surface you can add or remove, and permeable surfaces may count differently than concrete.
- HOA covenants: Many subdivisions restrict hardscape materials, colors, and placement, and some require architectural review approval before work starts.
- Easements and setbacks: A utility or drainage easement across your lot can limit where you can build, even on your own property.
A quick call or website check now prevents a stop-work order or forced rebuild later.
Check Soil Conditions and Infiltration Capacity
Soil type determines drainage speed: sand drains quickly, clay slowly, and most yards are a mix.
Do an infiltration test: dig a hole 12 inches deep and wide, fill it with water, and time the drain. Under 4 hours means good infiltration; longer means slow-draining soil that may need a French drain beneath the walkway.
Heavily trafficked or built-up soil may be compacted and drain poorly; breaking it up improves drainage significantly.
Watch for clay layers just below the surface, which block downward drainage. If you hit clay during excavation, break through it or install a French drain to move water sideways.
Plan Your Walkway Layout and Grading
Sketch the walkway first, marking start and end points and measuring the distance and width you want.
A gentle 1-2% slope moves water off the surface, about 1-2 feet of drop per 100 feet.
Decide where water should flow, one side, both sides, a rain garden, or a swale, since this changes how you grade the subgrade.
A light-traffic path needs less base preparation than a driveway-style walkway. We design walkways that match both drainage goals and how the space will be used.
Mark electrical, gas, and water lines on your plan to keep excavation safe.
Excavate and Prepare the Subgrade
Excavation depth is set by your soil, your rainfall, and the loads the walkway will carry, not by a single number. The goal is to remove unsuitable material and build a base deep enough to store and infiltrate water during a storm.
How Deep to Dig
A common starting point is excavating for the full build-up, base aggregate, bedding layer, and paver thickness, roughly 6-10 inches total for a foot-traffic walkway, and more where soil drains slowly or vehicles will load it.
With heavy clay or poor infiltration, go deeper, sometimes 10-12 inches, for a thicker base and, where needed, a subsurface drain. Your infiltration test sets the number, not a rule of thumb.
Remove and Compact the Subgrade
- Strip all grass, roots, and organic debris; decomposing material creates voids that cause settling.
- Remove rocks larger than about 1 inch; large stones create voids.
- Compact the exposed subgrade with a plate compactor or hand tamper, in lifts if you dug deep.
- Do not over-compact clay subgrade. Over-compacting seals it and destroys infiltration. Compact enough to stabilize, then stop.
- Confirm slope as you go with a level and straight board.
Set the Slope
A 1-2% slope moves surface water off without looking steep, roughly 1/8 to 1/4 inch per foot. Check it with a level and straight board at several points.
Build the Base in Lifts
The aggregate base stores and infiltrates most stormwater. Spread it in 2-4 inch lifts and compact each before adding the next; a single thick layer leaves the bottom loose.
Use angular crushed stone, typically 3/4-inch or smaller, not rounded gravel, angular stone interlocks and compacts, while rounded gravel shifts under load. A clean, open-graded stone with few fines lets water move through.
Geotextile Fabric
A non-woven geotextile between subgrade and base keeps fine soil from migrating up and clogging the stone. Use it where soil is silty or clay-heavy; skip it only where the subgrade is clean, stable, and free-draining. Persistent moisture issues in these dense environments often require broader strategies for landscaping for clay soil to ensure the long-term integrity of your permeable installation.
Local Soil and Rainfall Considerations
With expansive clay and intense storms, the design must infiltrate what it can and route the rest away: a deeper open-graded base, a geotextile separation layer, and an overflow path such as a French drain or swale connection. If you hit a clay layer just below the surface, break through it or install a subsurface drain to move water laterally.
Understanding the Permeable Paver Installation Process
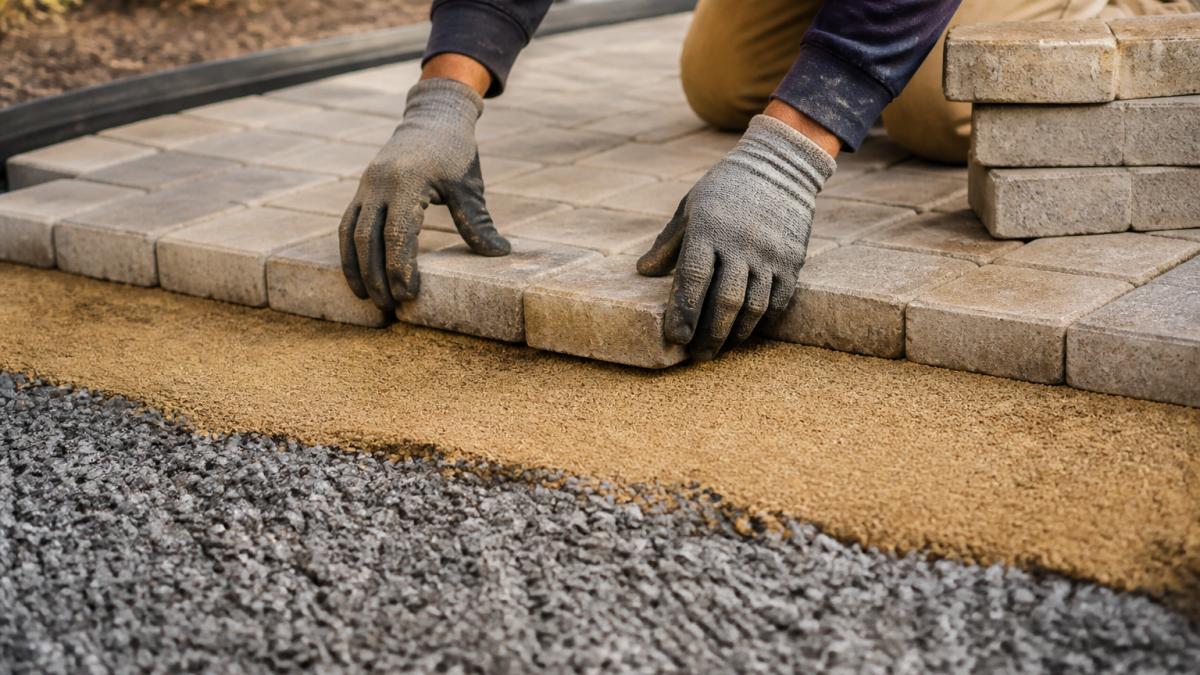
The permeable paver installation process has distinct layers, each serving drainage and stability. Understanding them helps you choose materials and thickness.
Install Aggregate Base Layers
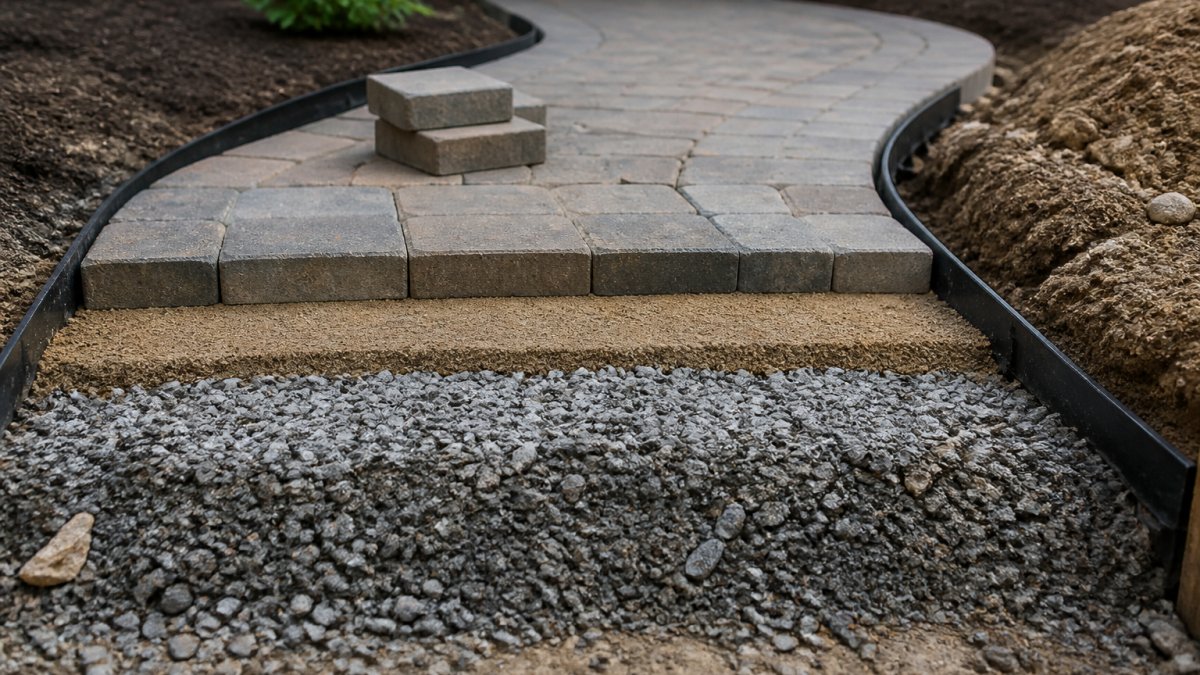
The first layer above the subgrade is the aggregate base, crushed stone, usually 3/4 inch or smaller, providing drainage and stability.
Spread 4 inches of crushed stone over the compacted subgrade and compact firmly; most water drains through this layer before moving deeper.
Use angular crushed stone, not rounded gravel. Angular stones lock together and compact better. Rounded gravel rolls and shifts under weight.
Compact the base until firm with a plate compactor or hand tamper; a loose base causes uneven settling.
Add Bedding Layer and Edge Restraints
Above the base, spread 1-2 inches of bedding material, coarse sand or fine crushed stone, to level the pavers.
Rake the bedding smooth and check with a straight board that it's level or slopes correctly.
Install plastic or metal edge restraints now, securing them firmly to prevent pavers from shifting outward.
Without edge restraints, pavers creep outward, creating gaps where weeds grow and water pools.
Place Pavers and Fill Joints
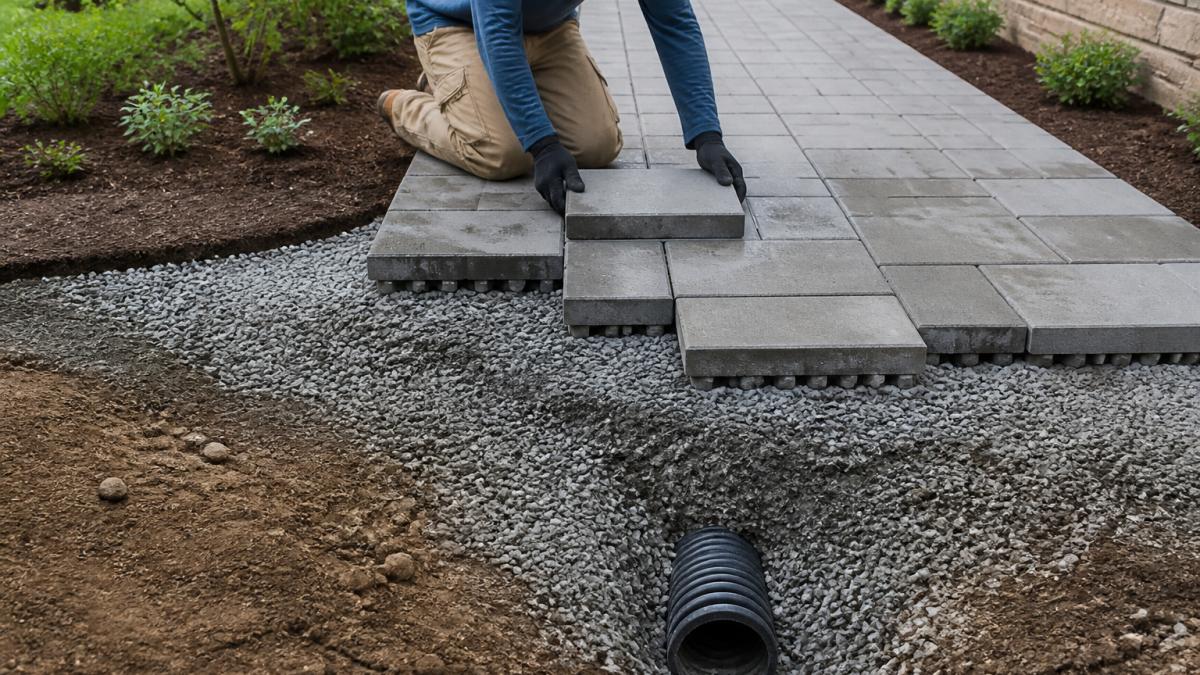
Lay pavers on the bedding, starting at one corner and working across, tapping each gently with a rubber mallet while checking level and slope.
Leave a 1/8-inch gap between pavers so water drains into the bedding layer below.
Once placed, fill the joints with coarse sand or permeable joint filler, sweeping it in to stabilize pavers and block weeds while letting water through.
Don't use regular concrete or polymeric sand, they block drainage. Stick with coarse sand or permeable joint materials.
Installing Permeable Pavers on a Slope
A slope steeper than 1:20 (5%) needs special handling, since fast water may not drain through the pavers properly.
Install pavers following the slope's contour and let water flow downhill through them naturally.
Add a French drain, a trench of crushed stone and perforated pipe, along the downhill edge to catch and move runoff safely away.
On very steep slopes, step-like pavers create small level sections that slow water and let it drain through instead of running off.
Compact each layer more firmly on slopes. Loose material shifts downhill over time.
Permeable Paver Cost Compared with Concrete
Permeable walkways cost more upfront than standard concrete, materials and installation take more care and precision.
But they solve drainage problems concrete can't: concrete pools water, while permeable pavers drain it, so a flooding yard gets fixed instead of worsened.
They also last longer in freeze-thaw climates, since water trapped under concrete cracks it in winter while permeable pavers drain it away.
Maintenance differs too: concrete cracks and needs sealing, while permeable walkways need occasional joint top-ups but avoid that cycle.
Consider drainage needs first: if water is a problem, permeable pavers are worth the extra cost; if not, concrete may be simpler and cheaper.
Permeable Walkway Maintenance and Drainage Testing
After installation, pour water on the walkway: it should drain through within minutes, not pool on the surface.
Keep joints filled, topping up joint material yearly or as needed since sand washes out over time.
Sweep debris off regularly; leaves and dirt block drainage, and a clean surface drains better.
In winter, avoid de-icing salts that clog permeable pavers; use sand or kitty litter for traction instead.
When you're ready to install permeable walkways for drainage that actually works, the right contractor makes all the difference.
Frequently Asked Questions
How do permeable pavers help manage water runoff?
Permeable pavers allow rainwater to infiltrate through the surface and into the soil below, rather than running off into storm drains. Water passes through the joints between pavers, through the bedding layer, and into the aggregate base, where it filters into the ground. This reduces standing water, prevents erosion, and helps recharge groundwater. For properties in the region with heavy rainfall, permeable walkways significantly reduce pooling and mud control issues.
What base materials are used under permeable pavers?
The base consists of multiple layers: crushed stone or gravel forms the primary aggregate base (typically 4-6 inches), followed by a thinner bedding layer of sand or fine aggregate (1-2 inches). Some installations include a weed fabric layer between the subgrade and base to prevent soil mixing while still allowing water infiltration. The aggregate base provides structural support and allows water to filter downward into the soil.
How do you maintain a permeable walkway?
Regular permeable walkway maintenance includes vacuuming or sweeping the surface to prevent debris from clogging the joints, which would block water infiltration. Every 1-2 years, pressure wash the pavers gently and re-sand the joints if needed. Inspect for settling or uplift, especially after major storms. Avoid sealing the surface, as this blocks permeability. Remove weeds from joints promptly to maintain drainage function.
Can pavers be laid on a slope?
Yes, permeable pavers on a slope require careful grading and edge restraints to prevent movement. Install stronger edge restraints on downslope sides and compact the subgrade thoroughly. Use a slope of 1-2% for drainage without excessive runoff velocity. On steeper slopes, consider adding a French drain or culvert alongside the walkway to manage water flow. Professional installation ensures proper slope preparation and prevents trip hazards from uneven settling.