 how-to
How to Design a Curved Backyard Pathway
Table of Contents
- Start With a Plan: Route, Destination, and Curved Garden Path Ideas
- How to Lay Out a Curved Path: Marking the Curve
- Garden Path Width, Curve Radius, and Accessibility
- Best Materials for Garden Paths: Pavers, Stone, and Trade-Offs
- Base Preparation, Sand Bed, and Drainage for a Curved Backyard Pathway
- Laying Pavers and Stepping Stones Around a Curve
- Common Mistakes and Troubleshooting a Curved Backyard Pathway
- Frequently Asked Questions
Last Updated: October 17, 2026
Start With a Plan: Route, Destination, and Curved Garden Path Ideas
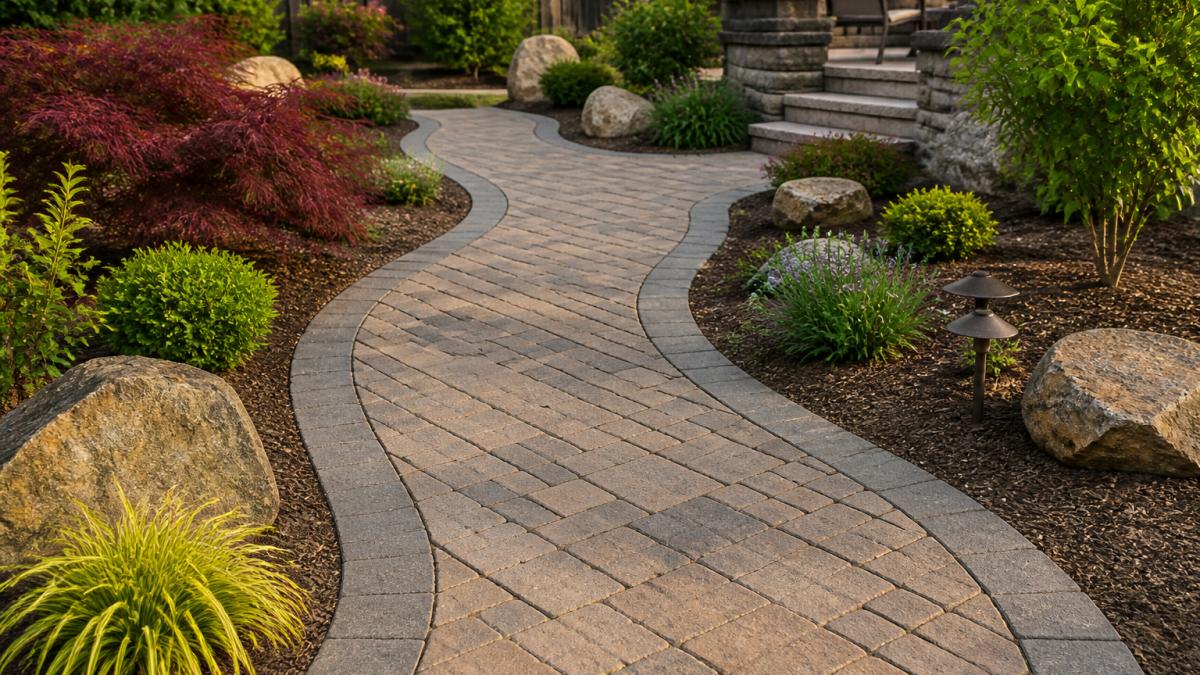
A curved backyard pathway is a walkway with a gentle bend that guides people from one point to another while softening the hard lines of a yard.
Most failed paths start with a shape instead of a purpose. Before buying a paver, answer three questions:
- Where does the path begin, and where must it end?
- What sits along the way that people want to see up close?
- How many people will use it at once?
A good route connects a patio to a garden bed, a bench, a fire pit, or a side gate, swinging around a tree or boulder rather than cutting through it. Curves that follow a destination feel natural; curves added for decoration alone look forced.
Sketch the route on paper first. Mark the entry, exit, and every feature the path should pass, then draw two or three curve options and pick the calmest, easiest to walk.
How to Lay Out a Curved Path: Marking the Curve
Marking the curve is where most homeowners rush, and it costs them later. A garden hose is the fastest tool: lay it on the grass and slide it until the bend looks right from your kitchen window and the far end of the yard.
For sharper, repeatable curves, use wooden stakes and a string line. Drive stakes at the start, middle, and end, tie string between them, and adjust the middle stakes until the line sweeps smoothly.
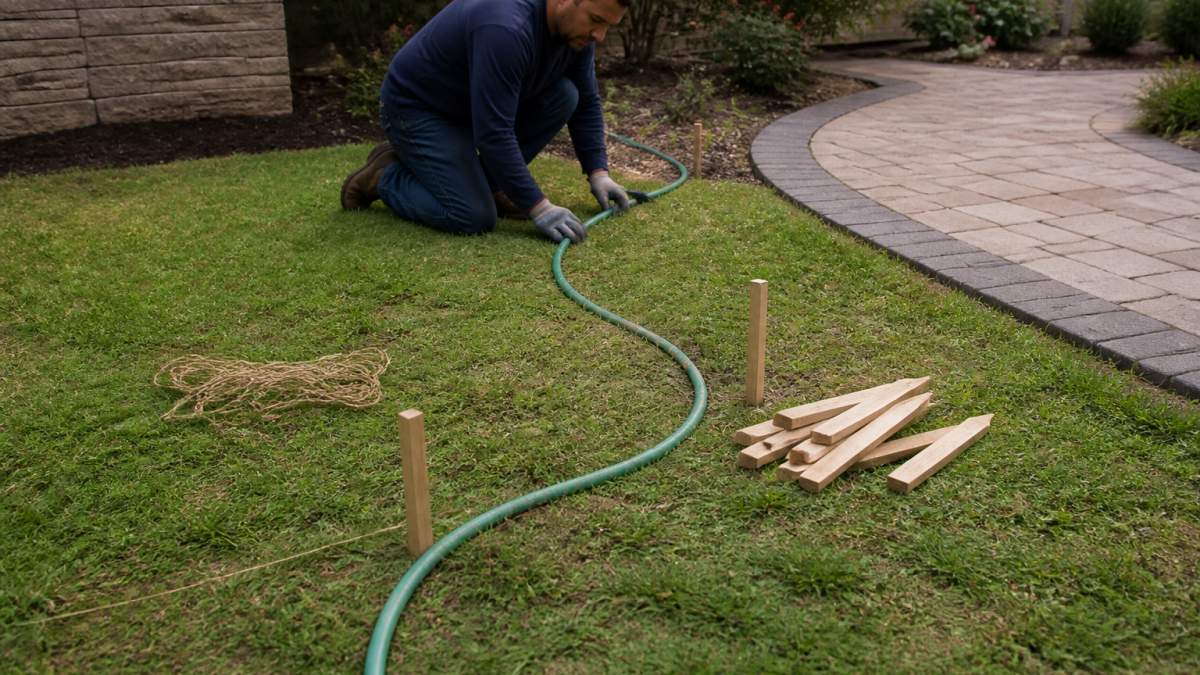
Translate the line into a buildable layout. A single hose marks the center of the path, not its edges.
Set the curve radius deliberately. Long, shallow bends read better than tight ones. Tie one end of a string at the center point of the bend, hold the other at the hose, and sweep it; that distance is your radius.
Account for the transition points. Where the path meets a patio, sidewalk, or garden bed, square the end to the adjoining surface rather than letting the curve run wild into it.
Three habits make this step reliable:
- Check the view from inside. Look at the hose line from your main window, since that is how you will see it daily.
- Keep the curve gentle. Long, shallow bends read better than tight ones.
- Mark both edges. Spray paint or flour lines on both sides of the hose give you a true width to dig.
Once the line looks right, leave it in place for a day. A curve that still pleases you the next morning is the one to build.
Garden Path Width, Curve Radius, and Accessibility
Path width and curve radius decide whether a walkway feels generous or cramped. A main garden path should run 36 to 48 inches wide so two people can pass; secondary paths to a bench or reading nook can drop to 24 to 36 inches. A tight radius forces walkers to slow and step short, while a wide radius keeps the walk smooth and looks better from a distance. Balancing these dimensions becomes particularly critical when working within restricted footprints, a challenge explored further in our landscape design guide.
| Path Type | Suggested Width | Suggested Curve Radius |
|---|---|---|
| Main walkway to patio | 36-48 in | 5 ft or more |
| Secondary garden path | 24-36 in | 3-5 ft |
| Stepping stone trail | 18-24 in | Flexible, follow the stones |
For accessibility, keep the grade gentle and the surface firm. The ADA Standards for Accessible Design set clear guidance on walkway width and slope that is worth reviewing if anyone in the home uses a walker or wheelchair.
Best Materials for Garden Paths: Pavers, Stone, and Trade-Offs
Material choice shapes cost, maintenance, and how the curve reads. Pavers and natural stone hold a curve best because each unit is small enough to follow the bend; large slabs resist curves and need cutting. The table below compares how well each material follows a radius, what it costs, and what it demands after installation.
| Material | Best For | Curve Behavior | Relative Cost | Maintenance Load |
|---|---|---|---|---|
| Concrete pavers | Tight curves, clean edges | Small units fan around a radius; cuts are clean with a wet saw | Moderate | Re-sand joints every few years; weed control in joints |
| Natural stone (cut) | Formal, tailored curves | Follows a radius with consistent joints; heavier to set | Moderate to high | Similar to pavers; occasional resetting of heaved units |
| Flagstone | Wide, irregular curves | Irregular shapes suit organic bends; thickness varies piece to piece | Moderate to high | Re-level individual stones; joint sand or mortar upkeep |
| Brick | Traditional look, gentle curves | Small units follow curves well; soft edges chip over time | Moderate | Re-sand joints; watch for spalling in freeze-thaw cycles |
| Gravel | Budget paths, soft curves | Conforms to any curve without cutting | Low upfront | Raking, topping up, and edging repair every season |
| Stepping stones | Light foot traffic | Spaced units follow any line; no continuous edge to cut | Low to moderate | Re-level stones as soil settles; weed control between stones |
How each material behaves on a curve. The tighter the radius, the more the material matters. Concrete pavers and brick win on tight bends because small units fan with even joints; a 5-foot radius is comfortable, and even 3 feet is workable with cuts.
Cost and labor trade-offs. Base preparation, edge restraint, and cutting labor often equal or exceed the material line for pavers and stone, while gravel shifts cost toward edging and annual upkeep. The cheapest material up front (gravel) carries the highest long-term maintenance, and the most expensive (cut stone) the lowest.
Durability and traction. All the hard materials above handle foot traffic well when the base is right. Traction matters most on slopes and in wet climates: textured concrete pavers and natural stone outperform smooth brick, and gravel can be slippery on a grade unless it is crushed and angular rather than rounded pea gravel.
A practical rule for curved paths. Choose the smallest unit that still gives the look you want. Small units follow curves with fewer cuts, waste pieces, and wandering joints. Reserve large slabs and long rectangular pavers for gentle sweeps or straight runs, where their scale reads as intentional.
For material guidance and standards, the Interlocking Concrete Pavement Institute publishes installation references worth checking before you buy.
Base Preparation, Sand Bed, and Drainage for a Curved Backyard Pathway
A path is only as good as its base. Skip this step and the curve will settle, heave, and crack within a season.
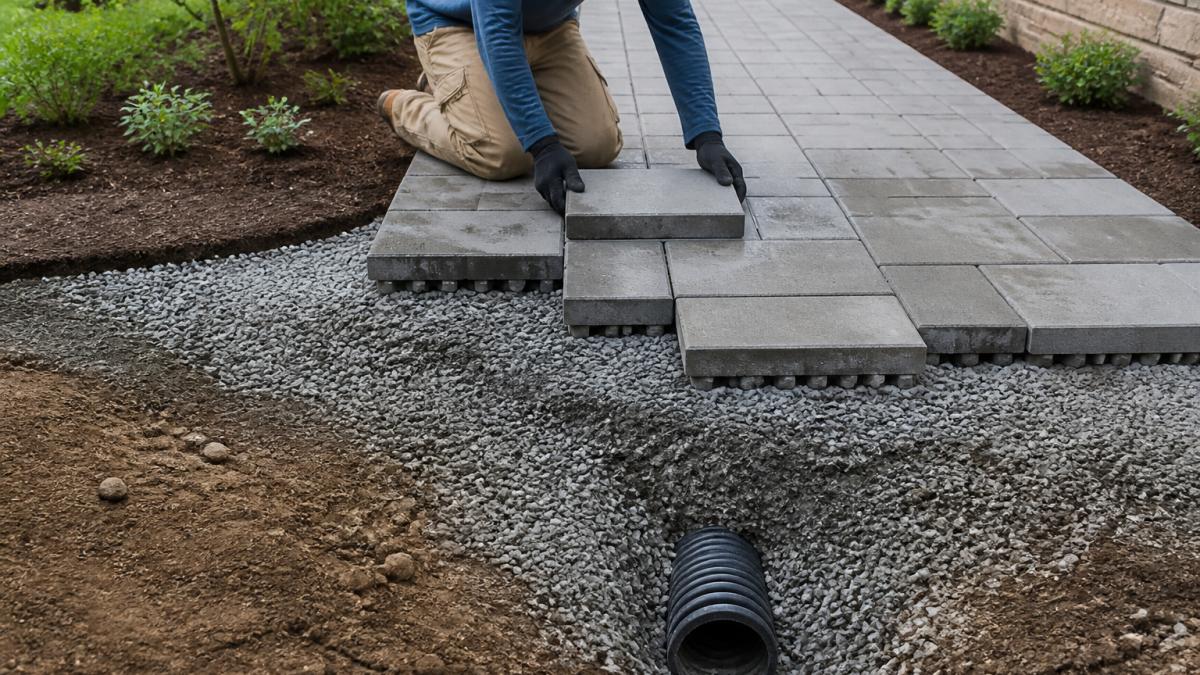
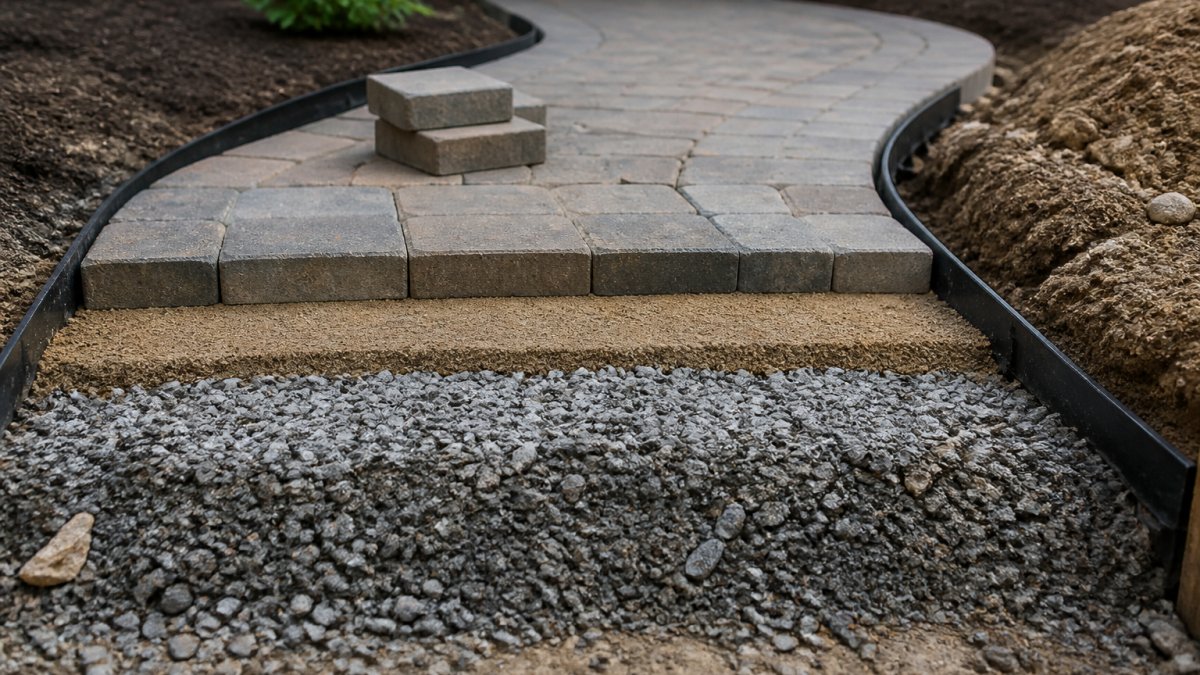
Dig out the full path area to about 6 to 8 inches deep. Compact the soil, then add crushed stone in 2-inch lifts, compacting each before the next. A laser level or string line with level points keeps the run true.
Next comes the sand bed: spread a 1-inch layer of coarse sand and screed it flat so pavers sit even and lock in place.
Drainage deserves equal attention. Give the surface a slight 1 to 2 percent slope so rain sheds to the yard or a drain rather than pooling. On a slope, add a border or edge restraint to hold the pavers and channel water.
Laying Pavers and Stepping Stones Around a Curve
Laying pavers around a curve is where craft shows. Start at one end and work along the outer edge first, since the outer arc sets the line the rest of the path follows.
For a tight bend, you will need to cut pavers. Mark each cut, use a wet saw for clean edges, and keep the cut side facing the border. Fan the pavers slightly on the inside of the curve so joints stay even.
Stepping stones follow a different logic. Space them 18 to 24 inches apart, center to center, and set each level with the ground. Bury them flush with the soil, then pack soil tight around each edge.
A few rules keep the curve clean:
- Keep joint gaps even across the whole bend.
- Cut rather than force a paver to fit.
- Set an edge restraint along both sides to lock the curve.
- Check level every few feet as you go.
If the work feels beyond a weekend, that is normal. Curves take patience.
Common Mistakes and Troubleshooting a Curved Backyard Pathway
Most curved path problems trace back to a handful of avoidable mistakes. Here are the ones we see most, and how to fix them.
- Curve too tight. Walkers cut the corner and wear a shortcut through the grass. Widen the radius or re-route.
- No edge restraint. Pavers spread outward over time. Add a border to hold the line.
- Thin base. The path dips and cracks. Rebuild with compacted crushed stone in lifts.
- Poor drainage. Water pools at the low point. Add slope or a drain.
- Uneven joints. The curve looks jagged. Re-cut pavers and fan them evenly.
Troubleshooting starts with the base and drainage, not the surface. If pavers rock or water stands, the fix is underneath: pull the affected section, re-compact, re-screed, and relay.
A well-built path also adds real value to a home. The National Association of Realtors has documented how outdoor hardscape improvements support resale appeal, which matters if you plan to sell.
Frequently Asked Questions
How wide should a backyard pathway be?
For a single-person garden path, 36 inches is a comfortable minimum; 48 inches lets two people pass and gives room for a wheelbarrow. If the path connects to a patio or serves as the main route to a shed, go wider. Garden path width also affects how the curve reads: a tighter radius on a narrow path looks sharper, while a wider path needs a gentler sweep to avoid awkward cuts on the pavers.
How do you make a smooth curve for a garden path?
Lay a garden hose or a chalk line on the ground and step back to check the sweep from both ends of the yard. Adjust it until the curve flows without kinks, then stake it every few feet and trace with marking paint. A string line pulled tight between stakes helps you check that the radius stays consistent. For a curved backyard pathway, a radius of 5 to 10 feet usually gives a natural, walkable bend.
What materials work best for a curved backyard pathway?
Pavers and cut stone give the cleanest curves because they can be trimmed to follow the radius. Flagstone and irregular stone suit an organic shape but need a skilled hand to fit. Decomposed granite and gravel are the cheapest options and handle curves easily, though they need edging to stay put. The best materials for garden paths balance budget, drainage, and how much cutting the curve requires.
How do you keep pavers aligned around a curve?
Snap a chalk line along the inside edge of the path and work from it, fanning the pavers slightly so the joints stay even. Cut the border pavers with a wet saw to match the curve rather than forcing full units into place. Check each row with a level and a string line. A rigid edge restraint pinned along both sides locks the curve in place and stops the pavers from spreading over time.
A curved path done right takes planning, a solid base, and clean cuts around every bend. If you would rather hand the digging, cutting, and compacting to a crew that does this daily, Moises Pizana Hardscapes builds custom walkways, patios, and retaining walls across the Dallas and Fort Worth area. We do not subcontract the work, and our team brings more than 15 years of experience to every project. Get a quote from Moises Pizana Hardscapes and turn your rough sketch into a walkway built to last.