 how-to
Retaining Wall Installation for Erosion Control
Table of Contents
- How Retaining Walls Stop Erosion: What Every Homeowner Should Know
- What You'll Need Before Installation Begins
- Best Materials for Erosion Control Walls
- Step-by-Step Retaining Wall Installation for Erosion Control
- Retaining Wall Drainage Requirements You Can't Skip
- Average Cost of Retaining Wall Installation in DFW
- Common Mistakes That Cause Retaining Wall Failure
- Frequently Asked Questions
Last Updated: September 16, 2026
How Retaining Walls Stop Erosion: What Every Homeowner Should Know
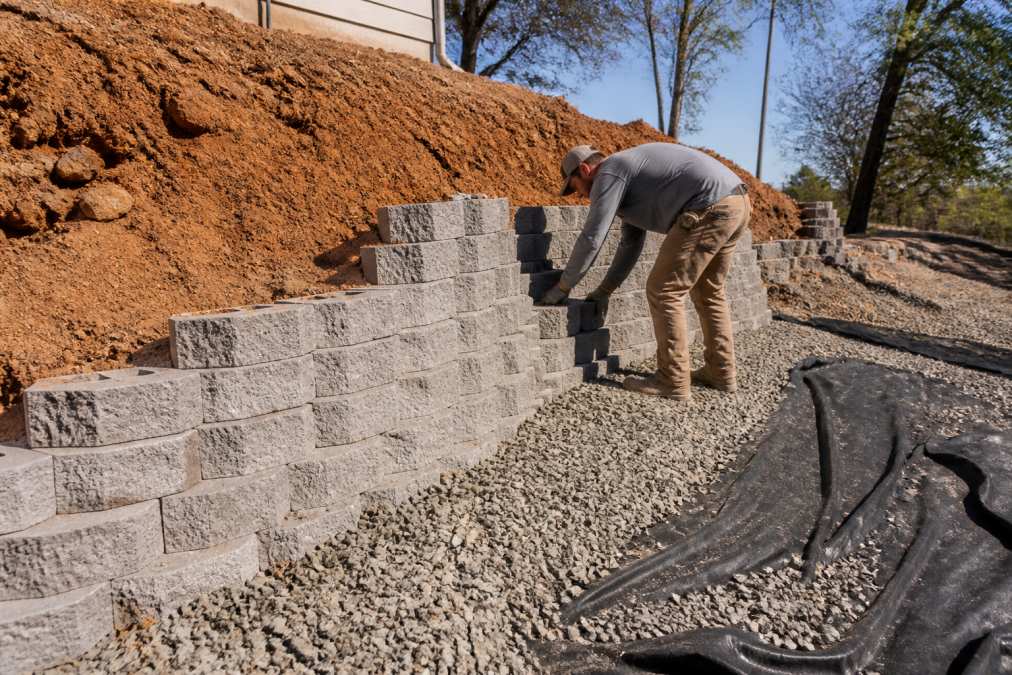
A retaining wall installation for erosion control is a structural solution that holds soil in place on a slope, redirects surface runoff, and prevents the gradual loss of your yard to rain and gravity. At Moises Pizana Hardscapes, we build these walls across the Dallas and Fort Worth area, where expansive clay soils and heavy spring storms make erosion a year-round concern.
What You'll Need Before Installation Begins
Before any digging starts, you need three things: a permit where required, a clear read on your soil, and a plan for where water will go. Skipping any of these is the most common mistake we see on homeowner-built walls.
Permits and Local Building Codes
Most municipalities require a permit for retaining walls above a certain height, often around 4 feet, though the exact threshold varies by jurisdiction. Walls that hold back a surcharge, such as a driveway or structure above them, frequently need engineering review regardless of height. Check with your local building department before you buy a single block. The International Code Council's building code resources outline the structural standards that many local codes adopt.
Soil Testing and Geotechnical Assessment
Soil type determines how much lateral pressure your wall must resist. Expansive clay, common across North Texas, swells when wet and shrinks when dry, which moves walls that weren't designed for it. A geotechnical assessment identifies your soil composition, the depth of the frost line, and the bearing capacity of your base. For walls over 4 feet or any wall near a structure, this step is not optional.
Best Materials for Erosion Control Walls
Segmental retaining wall blocks are the best material for most residential erosion control walls because they interlock, drain freely, and tolerate minor settling better than rigid alternatives. But material choice for erosion control is not just about looks or upfront price. It is about how the wall behaves when the soil behind it is saturated, which is exactly when erosion is doing its damage.
| Material | Best For | Key Strength | Watch Out For |
|---|---|---|---|
| Segmental blocks | Most residential walls, slopes under 4 ft | Interlocking, free-draining, repairable in sections | Needs a compacted base and proper aggregate |
| Natural stone | Low decorative walls, dry-stacked faces | Long lifespan, high permeability | Irregular, hard to align, labor-intensive |
| Poured concrete | Tall or load-bearing walls, surcharge above | Maximum structural integrity | Requires engineering and reinforcement; cracks if drainage fails |
| Timber | Temporary or very low walls | Low upfront cost | Rots within years, poor long-term erosion control |
| Gabion baskets | Steep slopes, high-flow runoff channels | Excellent drainage, flexible, tolerates settling | Bulky, requires stone fill, less residential aesthetic |
Why Permeability Matters More Than Strength
Erosion control walls fail from water pressure far more often than from lack of structural mass. A material that lets water pass through, segmental block with open cores, gabion, dry-stacked stone, relieves that pressure naturally. A material that traps water, poured concrete, mortared stone, timber, depends entirely on the drainage system behind it to survive. If you choose a rigid material, budget for a more robust drainage design.
Matching Material to Slope and Soil
For most homeowners balancing durability, drainage, and cost, segmental blocks remain the practical choice. Poured concrete makes sense when a wall must carry a surcharge, such as a driveway or structure above it, and the budget allows for engineering. Timber is a short-term fix at best, it rots, loses strength, and offers the weakest long-term erosion protection of any option here.
Step-by-Step Retaining Wall Installation for Erosion Control
Proper retaining wall installation follows a fixed sequence: excavate, build a level base, then stack and backfill in stages. Rush any step and the whole wall suffers.
Step 1: Site Excavation and Base Trench
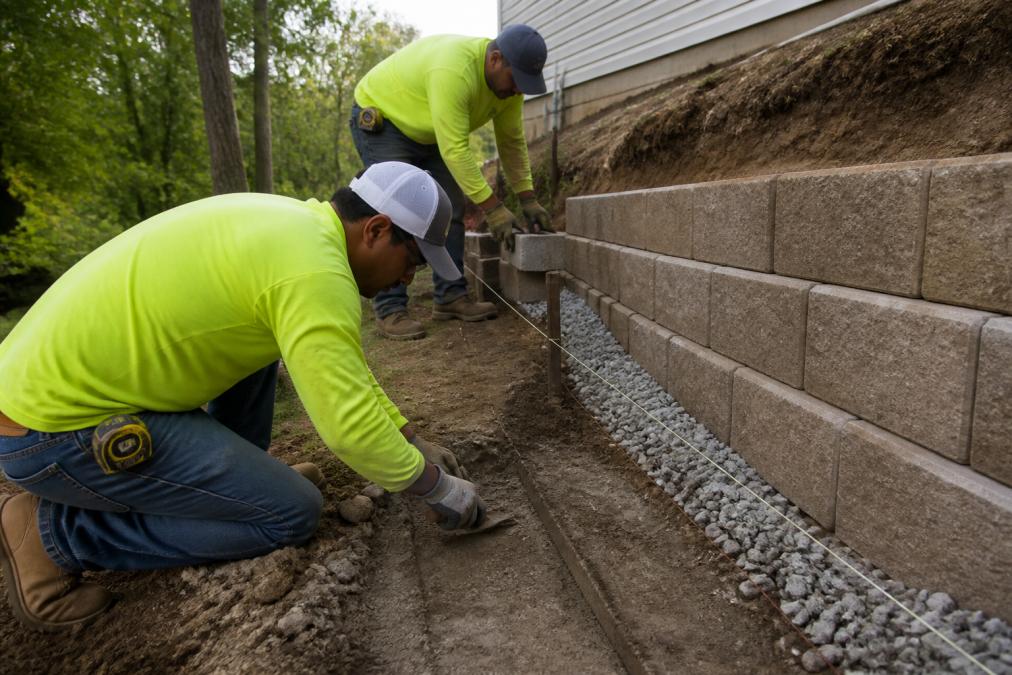
Excavate a base trench wide enough to hold your first course plus the drainage aggregate behind it. Dig below the frost line so the base won't heave in winter. Compact the trench floor before adding anything. A common mistake is digging too shallow; the buried portion of the wall is what keeps it from sliding.
Step 2: Leveling Pad and First Course
Spread and compact a leveling pad of crushed stone, then set the first course of blocks. Check every block with a level and a mason line stretched along the wall face. The first course sets the standard for every course above it. Get this wrong and no amount of adjustment later will fix it.
Step 3: Stacking, Backfill, and Compaction
Stack subsequent courses with a slight backward lean, known as wall batter, and fill each course with drainage aggregate as you go. Compact the backfill material in lifts, not all at once. Install geotextile fabric between the aggregate and the native soil to keep fines from clogging your drainage zone. For taller walls, deadman anchors tie the wall back into the slope.
Retaining Wall Drainage Requirements You Can't Skip
Every retaining wall needs a drainage system: aggregate behind the blocks, a perforated drainage pipe at the base, filter fabric to separate soil from stone, and weep holes to release water. Without these, hydrostatic pressure builds until the wall fails.
Average Cost of Retaining Wall Installation in DFW
The average cost of retaining wall installation depends on wall height, length, material, site access, and how much excavation the slope demands. Pricing also shifts with soil conditions and whether engineering is required.
- Wall height and total square footage of face
- Material choice, from segmental block to natural stone
- Site access for equipment and hauling
- Soil conditions and required excavation depth
- Drainage complexity and permitting requirements
Common Mistakes That Cause Retaining Wall Failure
Most retaining wall failures trace back to four avoidable errors: no drainage, a shallow or uncompacted base, missing filter fabric, and backfill that wasn't compacted in lifts. Each one is cheap to prevent and expensive to fix. But knowing the mistakes is only half the job. The other half is recognizing failure early, while it is still repairable.
| Mistake | What Happens | The Fix |
|---|---|---|
| No drainage system | Hydrostatic pressure builds, wall leans | Add pipe, aggregate, weep holes |
| Shallow base trench | Wall slides or heaves | Dig below frost line, compact |
| No filter fabric | Aggregate clogs with soil | Install geotextile between zones |
| Uncompacted backfill | Soil settles, wall misaligns | Compact in 6-inch lifts |
Warning Signs to Watch For
A wall rarely collapses without warning. The pattern is consistent and usually visible months before a serious failure:
- Bulging or bowing of the wall face. This is the classic sign of hydrostatic pressure building behind a wall that cannot drain.
- Leaning at the top. Often indicates a base problem or soil movement pushing the wall outward.
- Settlement or a gap opening between courses. Points to uncompacted backfill or a failing leveling pad.
- Water pooling at the base after rain. Means the drainage system is clogged or was never installed correctly.
- Soil washing out from between blocks or at the ends. Filter fabric is missing or has failed.
- Cracks in a poured concrete wall. Rigid walls crack when they cannot relieve pressure; this is a structural warning, not cosmetic.
Diagnosing the Cause Before You Repair
Before spending money on a fix, identify which failure mode you are dealing with, because the repair differs for each:
- Drainage failure shows up as bulging, wet soil at the base, or water staining on the wall face. The fix is to restore drainage, clear or add a perforated pipe, add or replace aggregate, and open weep holes. This is often the least expensive repair if caught early.
- Base failure shows up as leaning or sliding, sometimes with a visible gap under the first course. Repair usually means excavating the front of the wall, rebuilding the leveling pad, and resetting the first courses. This is a larger job.
- Backfill settlement shows up as a dip behind the wall or misaligned courses. It can sometimes be corrected by re-compacting and regrading, but if the wall face has already moved, the affected section may need to be rebuilt.
- Filter fabric failure shows up as muddy aggregate or soil migrating into the drainage zone. The drainage zone has to be excavated and rebuilt with new fabric.
Repair or Rebuild: A Practical Rule
A useful rule of thumb: if the wall is leaning or bulging by more than a small fraction of its height, or if the movement involves more than a short section, plan to rebuild rather than patch. Small, localized movement caught early, a single bulging course, a minor gap, can often be corrected by addressing drainage and re-compacting.
Frequently Asked Questions
Can retaining walls help stop erosion?
Yes. Retaining walls hold back soil on slopes, slowing surface runoff and preventing it from washing away topsoil. They also allow you to regrade the yard, which directs water away from vulnerable areas. When paired with proper drainage like weep holes and drainage aggregate, a retaining wall installation for erosion control can reduce soil loss significantly and protect your landscape.
What is the 1/3 rule for retaining walls?
The 1/3 rule means the buried portion of each block should be about one-third of its height. For example, a 6-inch block should be buried 2 inches below grade. This ensures the wall has enough embedment to resist soil pressure and frost movement. Following this rule is a key part of proper retaining wall installation for erosion control, especially on sloped sites.
What materials are best for erosion-control retaining walls?
Segmental concrete blocks, natural stone, and poured concrete are all effective. Segmental blocks are popular because they're engineered for stability, easy to install, and allow for wall batter. Natural stone offers a classic look but requires more skill. For high walls or steep slopes, poured concrete with cantilever design provides the most strength. The best choice depends on your soil, slope, and budget.
Do I need a permit for a retaining wall in my area?
Permit requirements vary by city and county. Many municipalities require a permit for walls over 3 or 4 feet tall, and some also require engineering drawings. In the DFW area, check with your local building department before you dig. Skipping permits can lead to fines, forced removal, or problems when you sell your home. Always confirm local rules first.
Erosion doesn't wait, and a wall built without proper drainage, base prep, and compaction will only delay the problem. Moises Pizana Hardscapes builds retaining walls designed to hold, with expert hardscape design and installation, our own equipment and crew, and more than 15 years of experience on DFW slopes, and we never subcontract the work. If water is pooling against your foundation or your slope is washing away, get a quote and let us build a wall that actually solves it.